Introduction
- Theme Version: 1.0.0
- Created: 14-11-2016
- Latest update: 14-11-2016
Thank you for purchasing our theme. In this document, we provide all kinds of good information with all the details you need to use our theme. We hope you have fun and enjoy working with our theme. If you need more help, please feel free to open a ticket on our support center.
Before Getting Started
If you are not familiar with WordPress, please get accustomed with it before proceeding to using our theme. Here are some links that will help you to become more confident with WordPress:
- First Steps with WordPress: http://codex.wordpress.org/First_Steps_With_WordPress
- Explanations on most common WordPress terms: http://en.support.wordpress.com/lexicon/
- Best WordPress-related articles for Web Developers: http://net.tutsplus.com/articles/web-roundups/top-50-wordpress-tutorials/
- WordPress Optimization: https://codex.wordpress.org/WordPress_Optimization
Requirements & Compatibility
Requirements
To run WordPress your host just needs a couple of things:
- PHP version 5.3 or greater (recommended: PHP 5.4 or greater)
- MySQL version 5.0 or greater (recommended: MySQL 5.5 or greater)
Recommended PHP Configuration Limits
Many issues that you may run into such as: white screen, demo content fails when importing, empty page content and other similar issues are all related to low PHP configuration limits. The solution is to increase the PHP limits. You can do this on your own, or contact your web host and ask them to increase those limits to a minimum as follows:
- max_input_vars = 3000
- memory_limit = 128M
- max_execution_time = 300
- max_input_time = 300
- upload_max_filesize = 64M
- post_max_size = 64M
Compatibility
Our theme is compatible with these browsers:
- Chrome
- Firefox
- Safari
- Internet Explorer 10 or later
Installation
Wordpress Core
You download and install WordPress version 4.3 or later
Theme Package
To download, you need to log into your ThemeForest account and go to your http://themeforest.net/downloads page. Locate the theme that you purchased in your Downloads list and click on the Download button
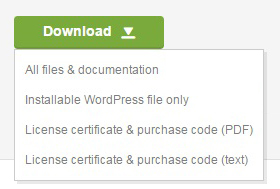
If you download All files & documentation, you will unzip it. Then, you find the installable file inside.
You can also download only the Installable Wordpress file.
WordPress Installation
Follow the steps below to install via WordPress:
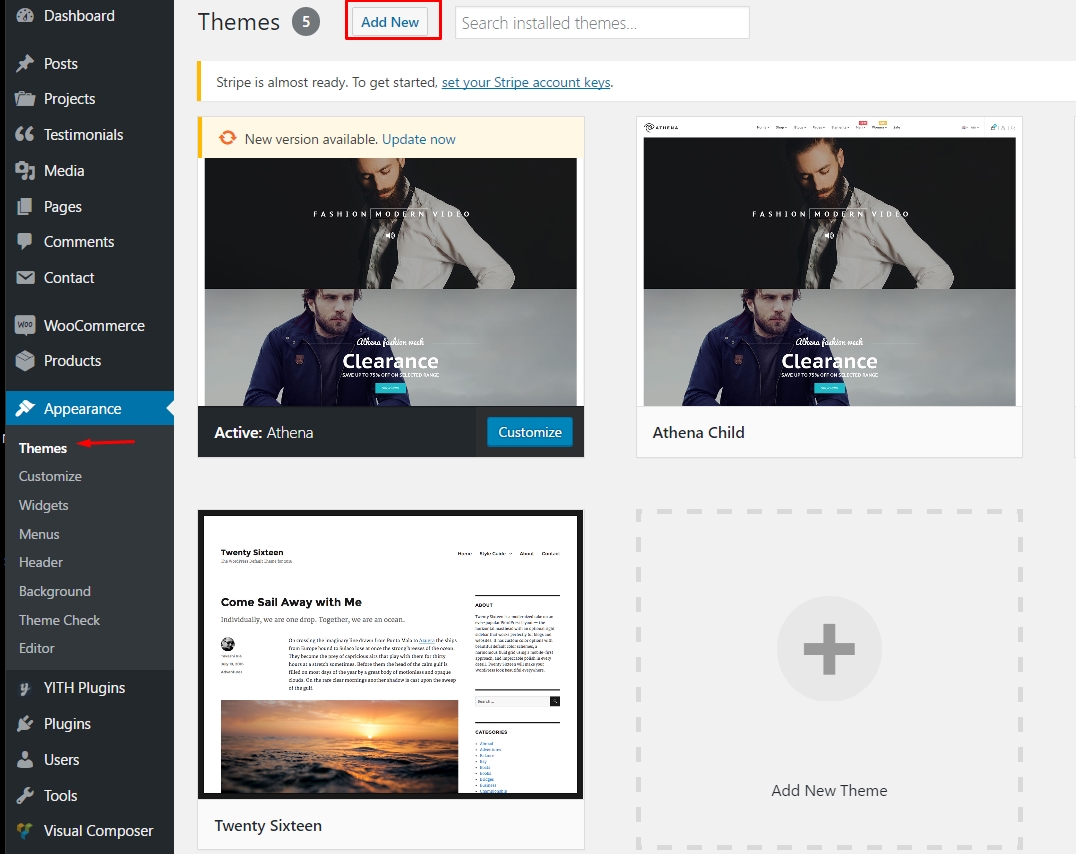
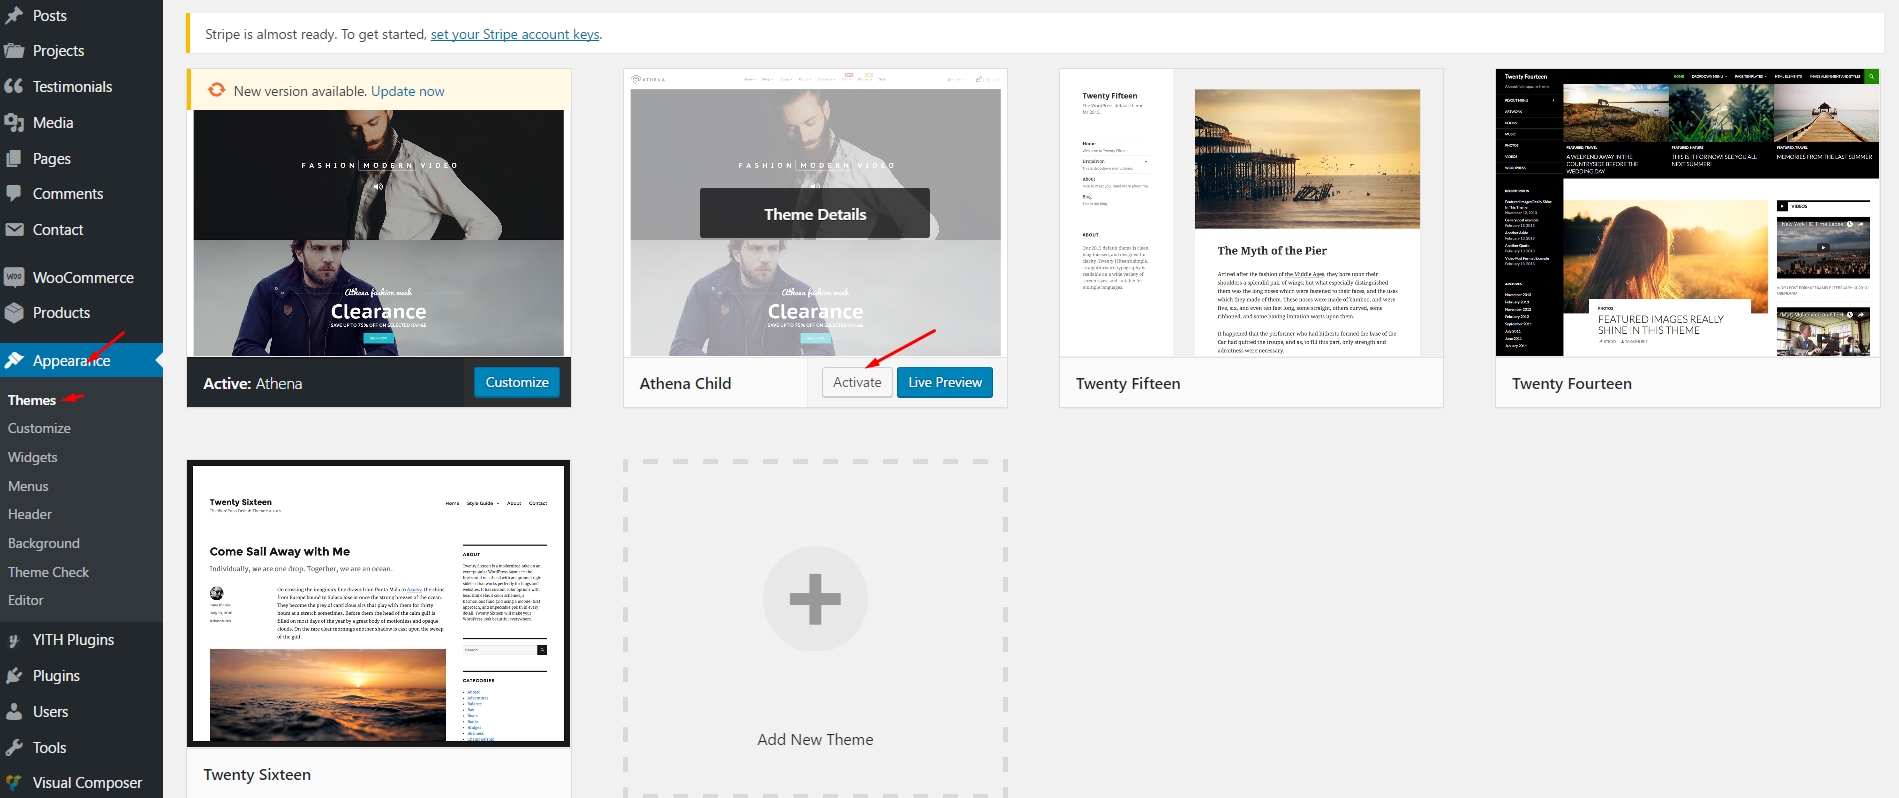
- In your WordPress Admin Panel, go to Appearance > Themes
- Click on the Add New and Upload Theme buttons
- Click on the Choose File button and navigate to find the Athena.zip file on your computer and click on the Install Now button
- Wait while the theme is uploaded and installed
- Activate the newly installed theme
- Then you will get a notification about installing the required plugins. Follow the steps to install and activate the plugins
FTP Installation
Follow the steps below to install via FTP:
- Log into your hosting space via an FTP software
- Unzip the Athena.zip file and ONLY use the extracted Athena folder
- Upload the extracted Athena folder into wp-content > themes folder
- Go to Appearance > Themes and activate Athena theme
- Then you will get a notification about installing the required plugins. Follow the steps to install and activate the plugins

Register purchased code
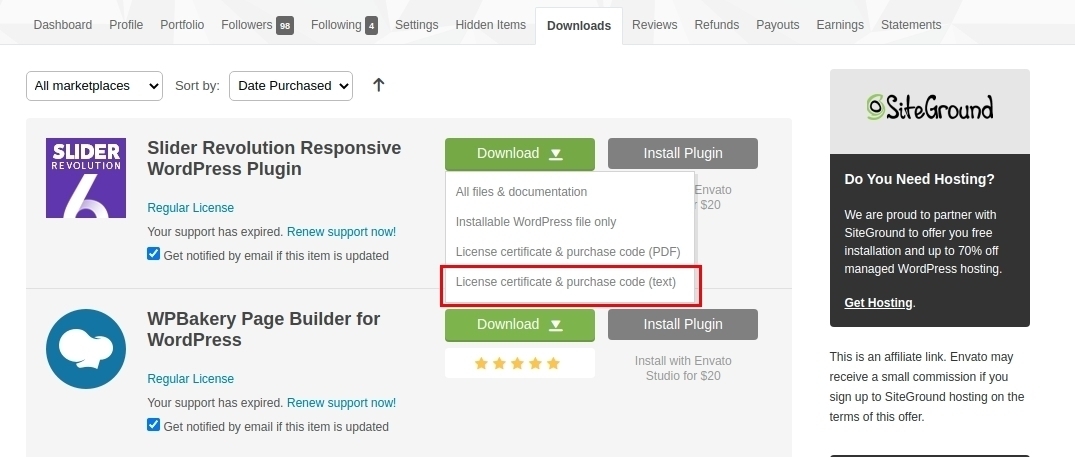
After activated our theme, you must register your purchased code to install and update plugins as well as use theme features.
To get your purchase code you can go to your account dashboard / download here:
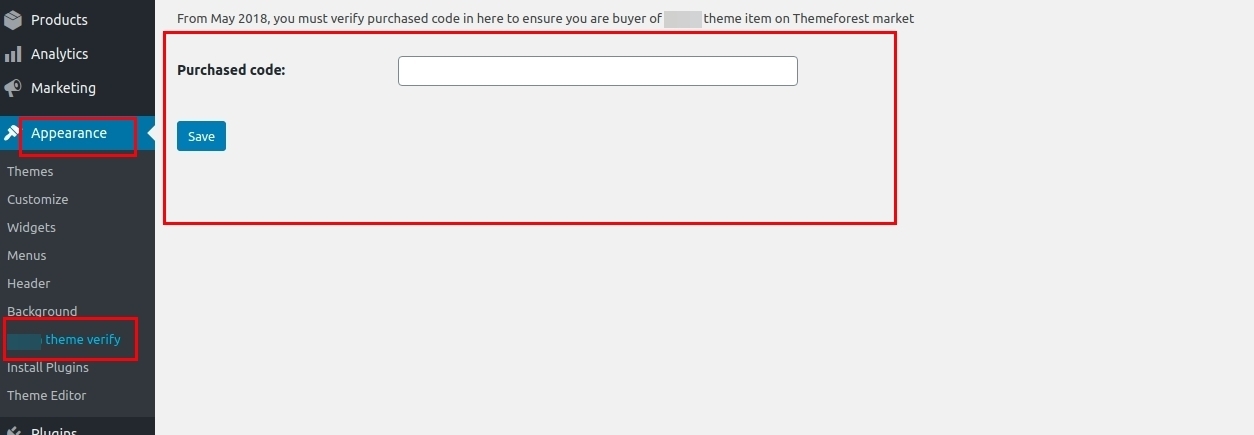
Then you can put in this page from red message in dashboard:

Or from wordpress menu, then put on text field and submit, if it return green message that is successful.
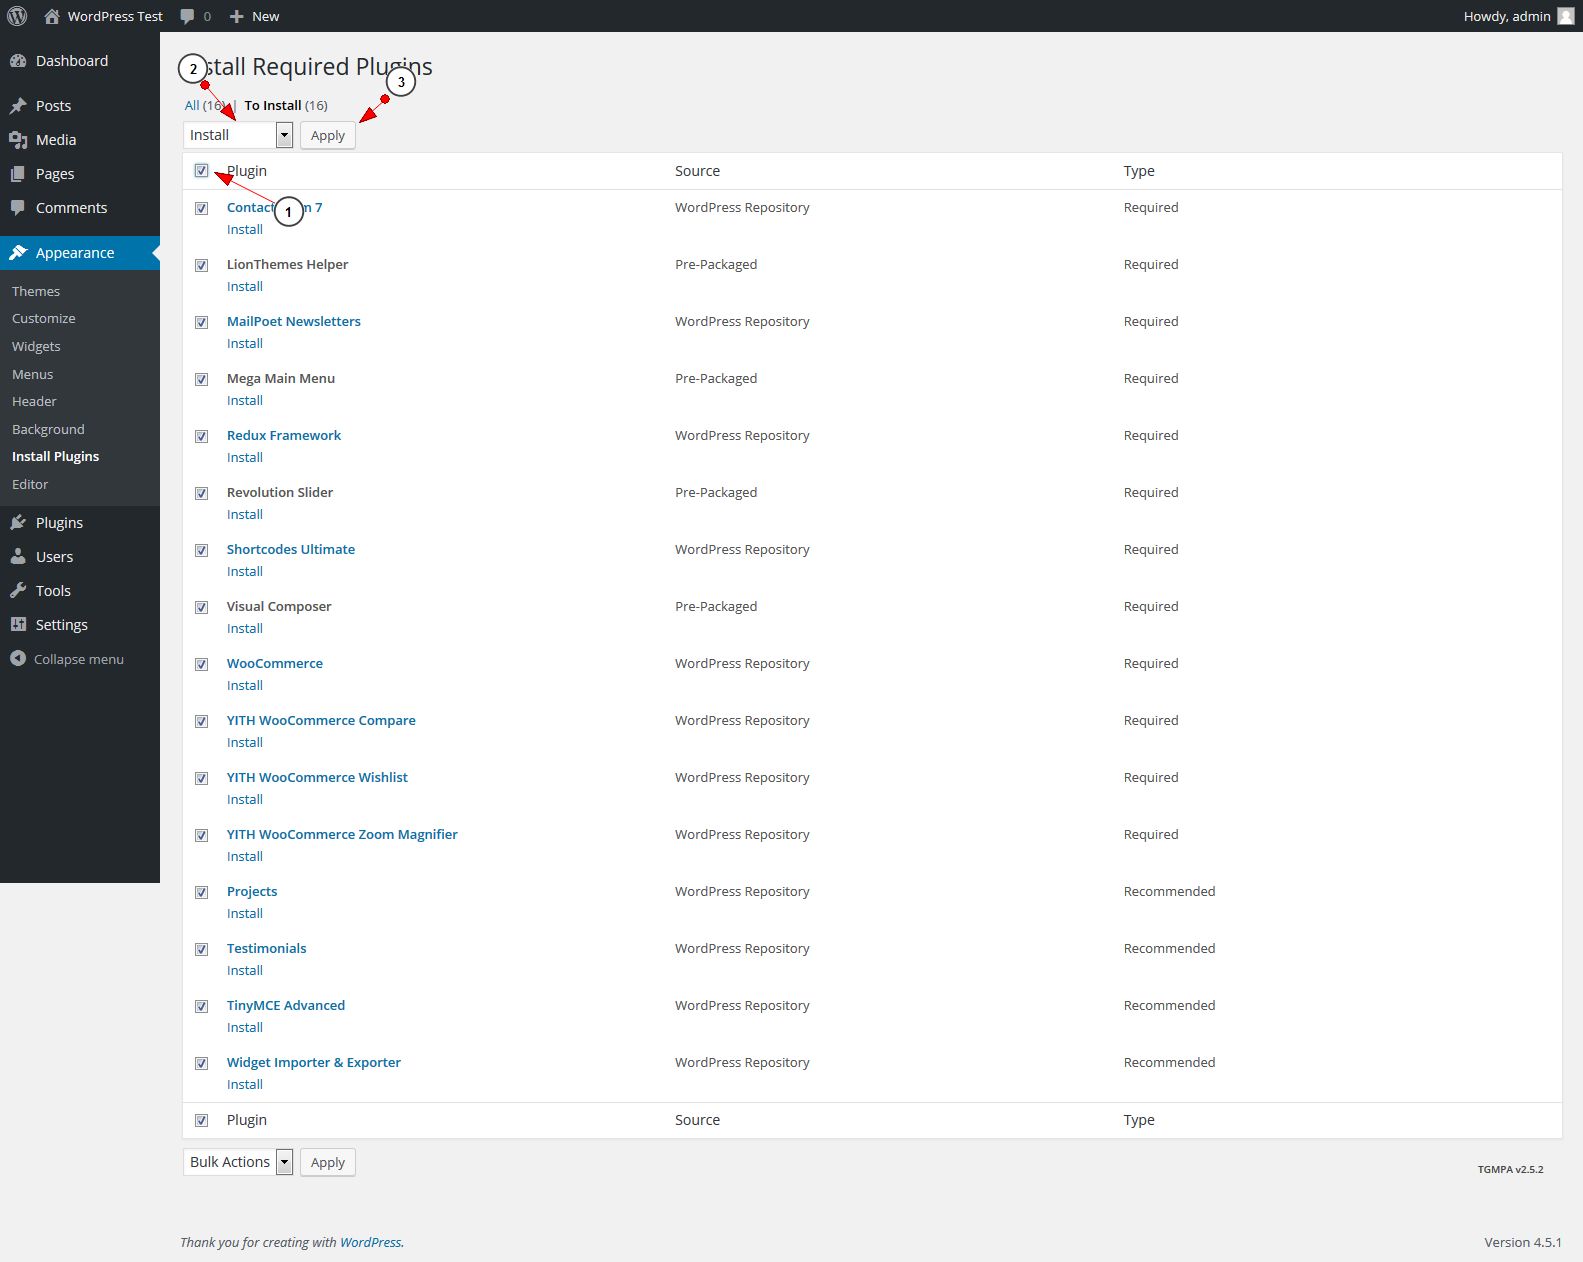
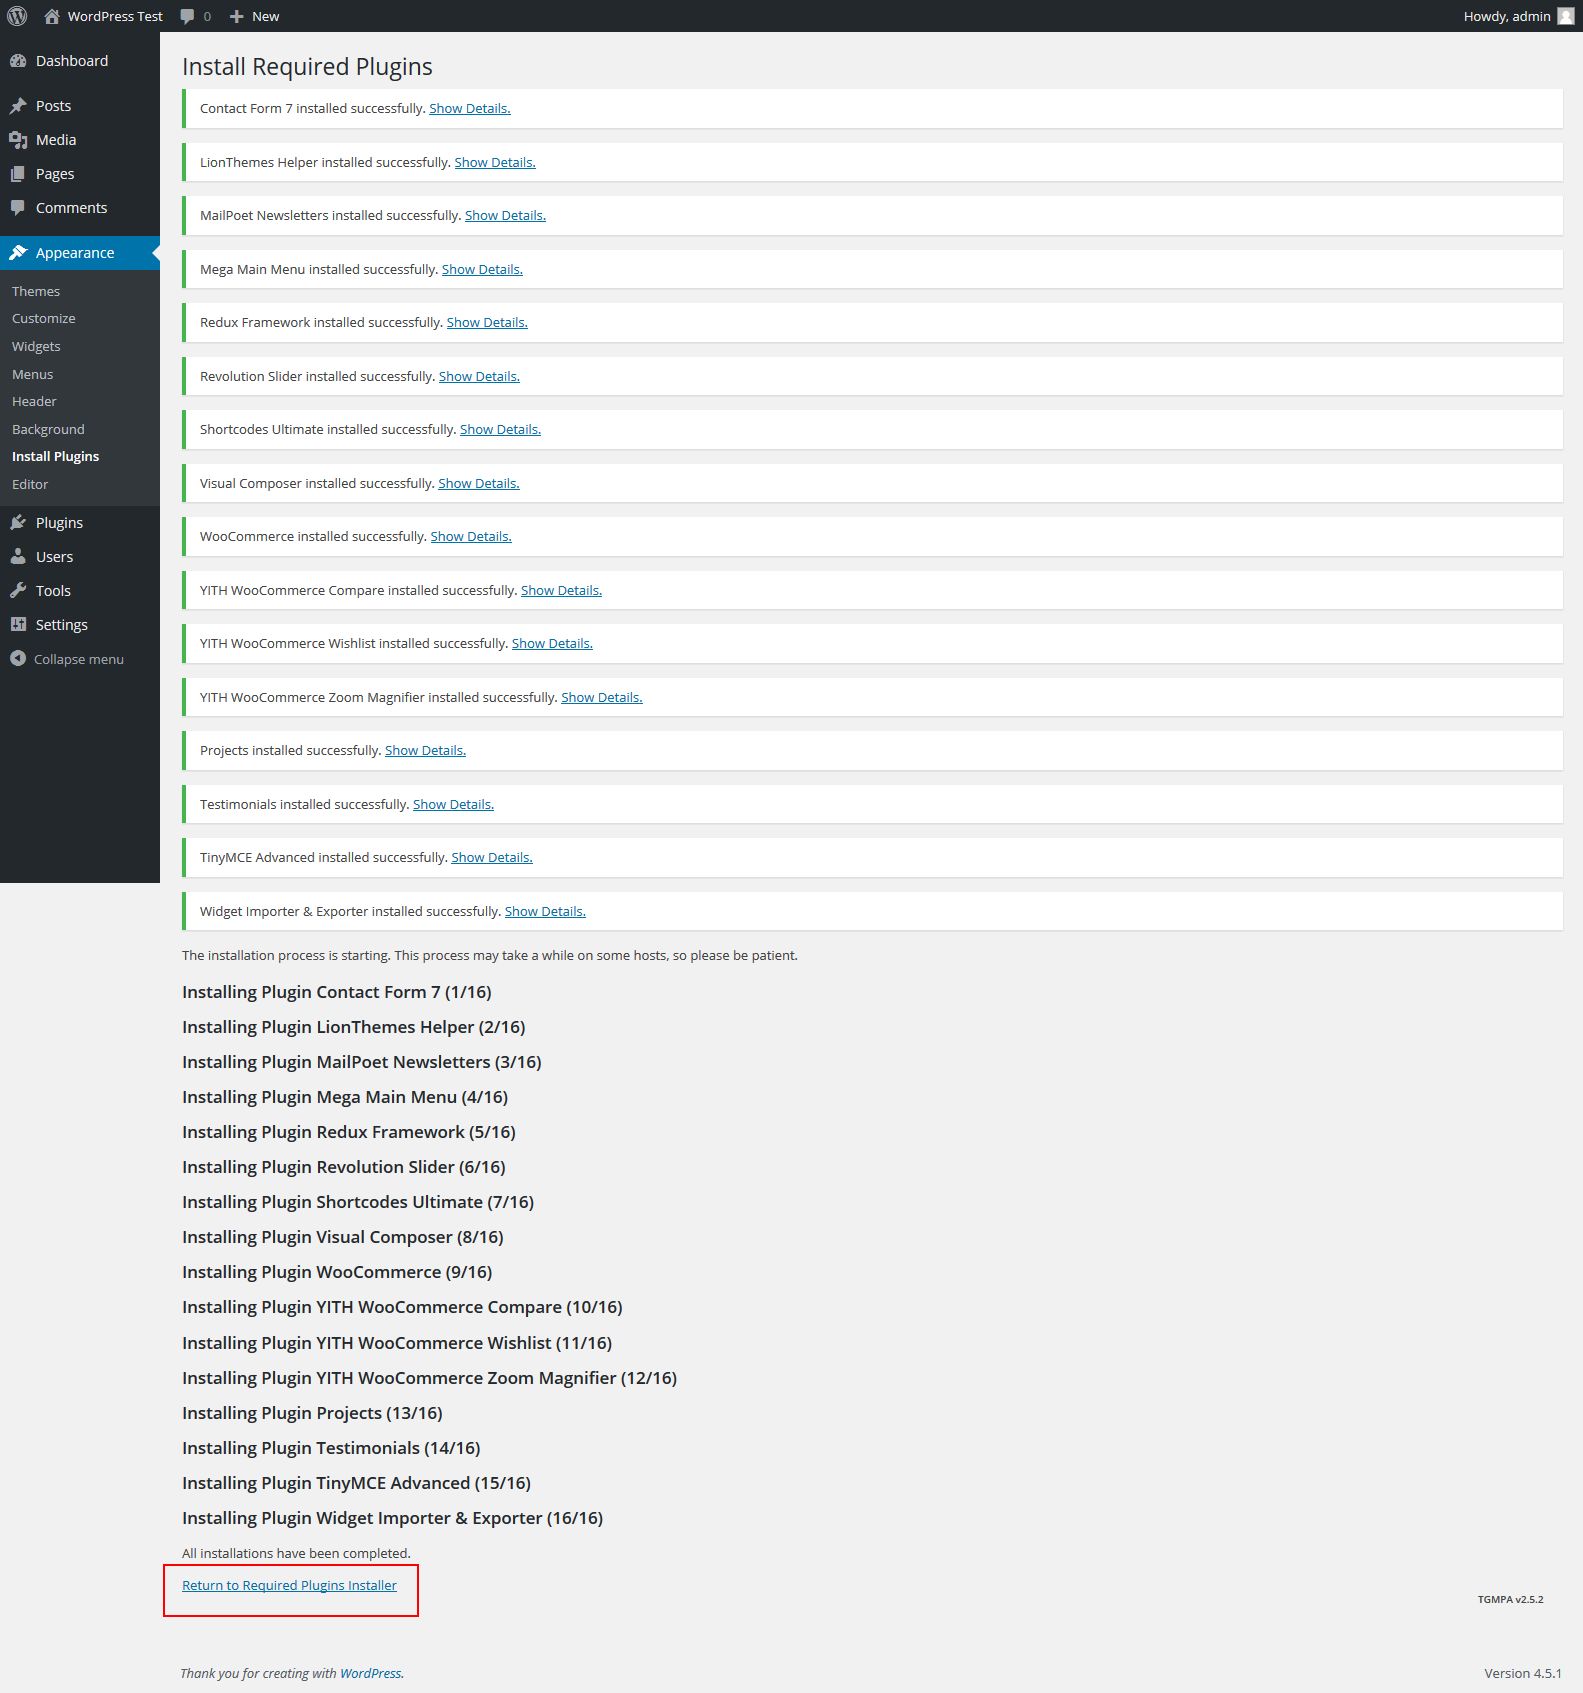
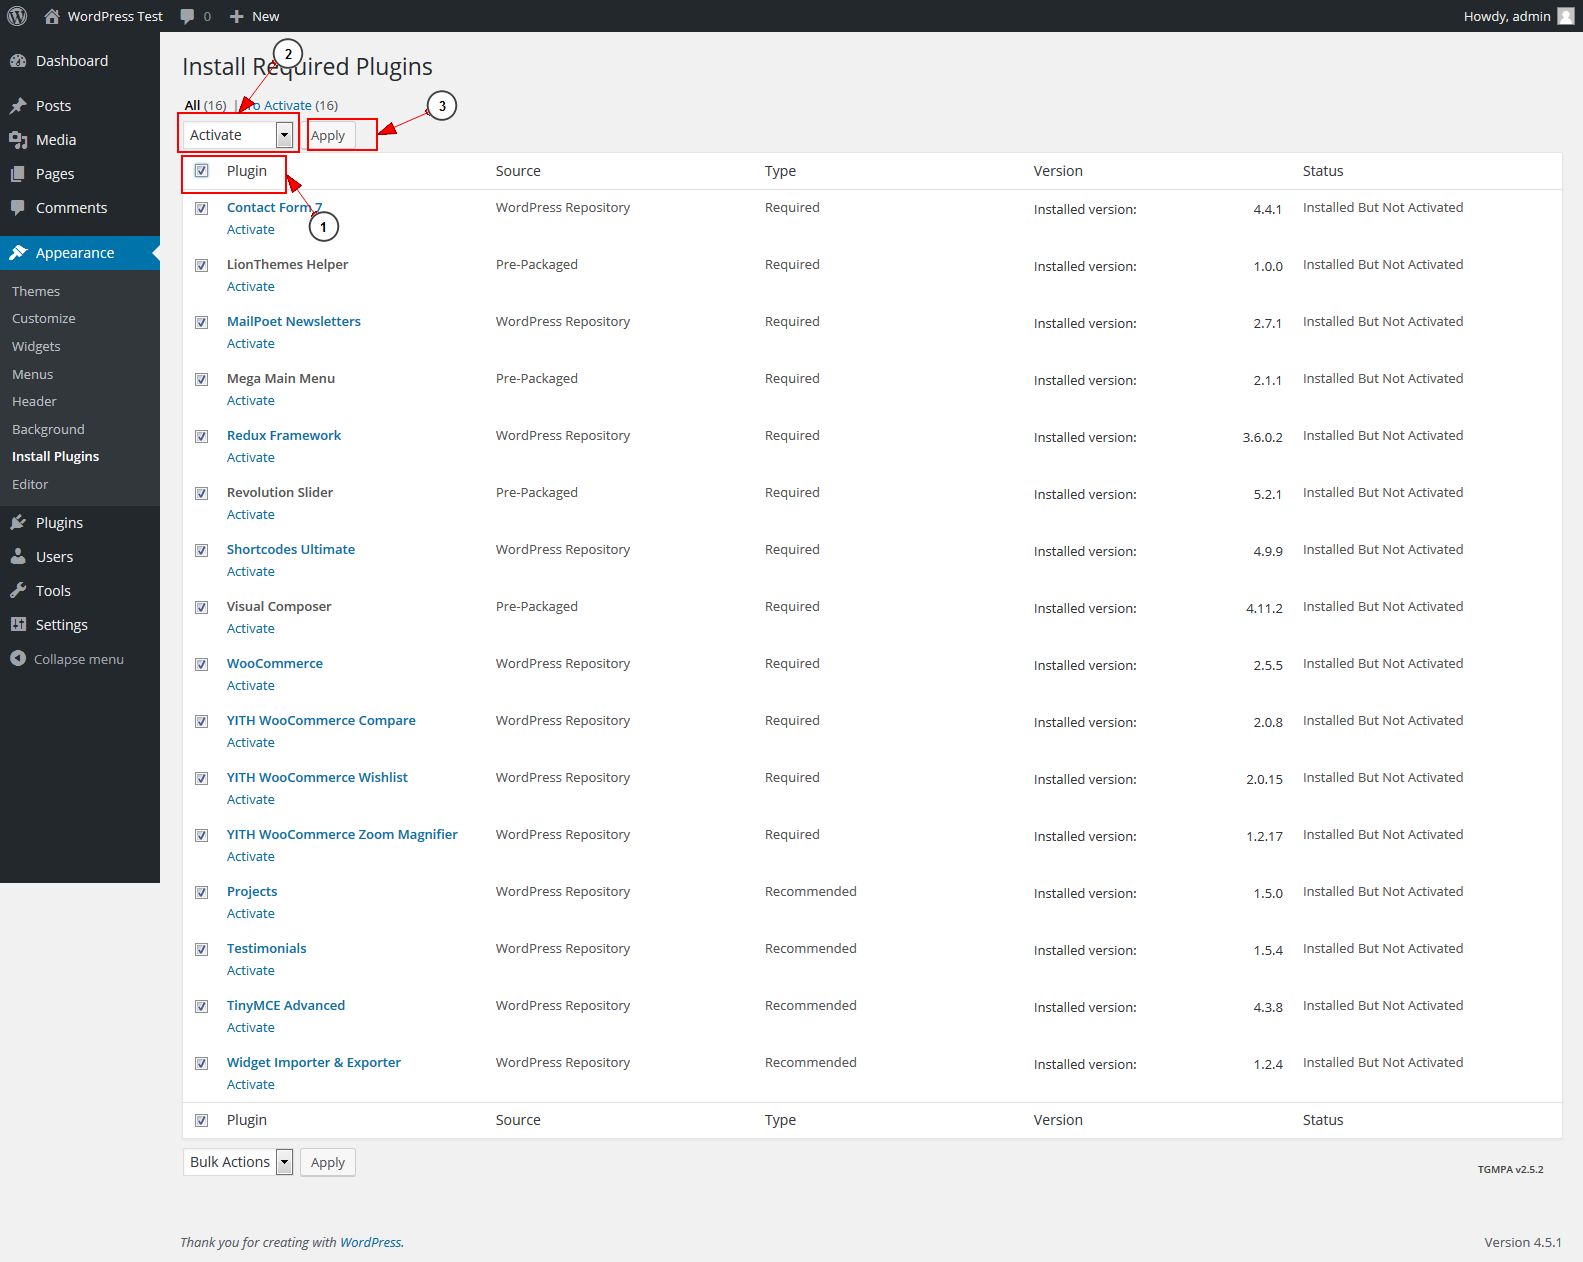
Required Plugins
After activating the theme, you will get a notification about installing the required plugins. You go to Appearance > Install Plugins to install them.

We also notice that you should not update other plugins without updating the theme. Please see our changelog to make sure the current theme's version is compatible with the new plugin's version.
Sample Data
Manual import
We can import content for projects, contact form,..
Login to your WordPress dashboard, navigate to Tools - Import. Click on WordPress link on the table then click Install Now button on popup window to install WordPress Importer.
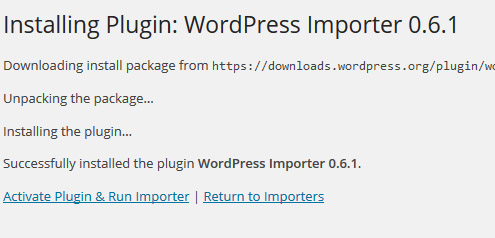
Click on Activate Plugin & Run Importerlink to begin
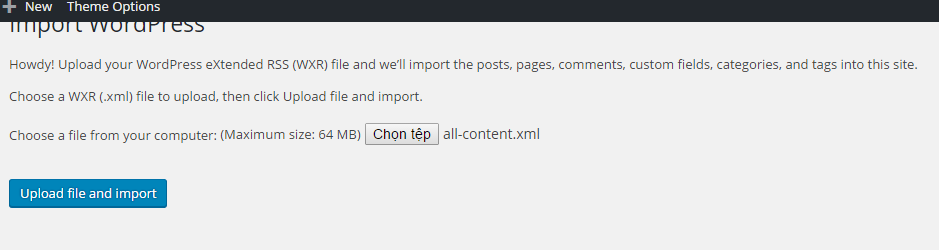
Click "Browse..." button and select XML files in "sample-data/exported_files" folder. :
- all-content.xml: This is exported of many content, includes posts, pages, products, contact form, menus. You can ignore this file if you website has already content.
Click on Upload file and import button
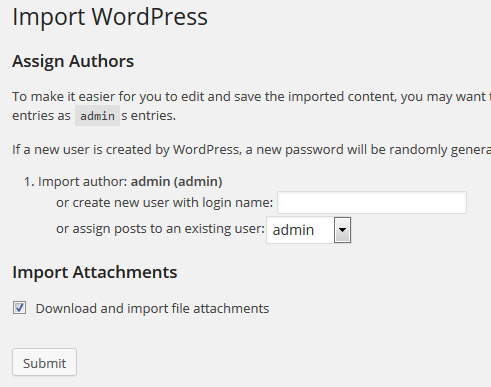
On the next interface, select existing user on dropdown, check on Download and import file attachments to download sample images.
Click on Submit button to import.
All the content blocks are for sample, after importing finished, you have to edit them. Go to Content Blocks menu to see all, click on each block to edit.
If the process Import Data fails , you can import the data again
Athena import
We can import all content, slideshows, widgets, mega main menu settings, theme options, menu localtion by only one click.

The menu items can not be imported, so we must add them by manual in Appearance > Menus follow Menu document section.
Note
You must reload page after import finished.
When finish import data, you must go to page manage and edit home page all product category blocks and re-setting to new category ID.
Updating The Theme
Manual Update
Follow the steps below to manually update the theme:
- First, you download the new theme package from themeforest. You have to log into your themeforest account and navigate to Downloads tab. You find the Athena theme in your purchased themes list.
- You can delete the current theme. Don't worry about this. Your data won't be lost.
- You upload the new theme package via Wordpress or FTP software.
Theme Options
After activating our theme, you can go to Theme Options to configure the theme. Below will explain what you can do with Theme Options.
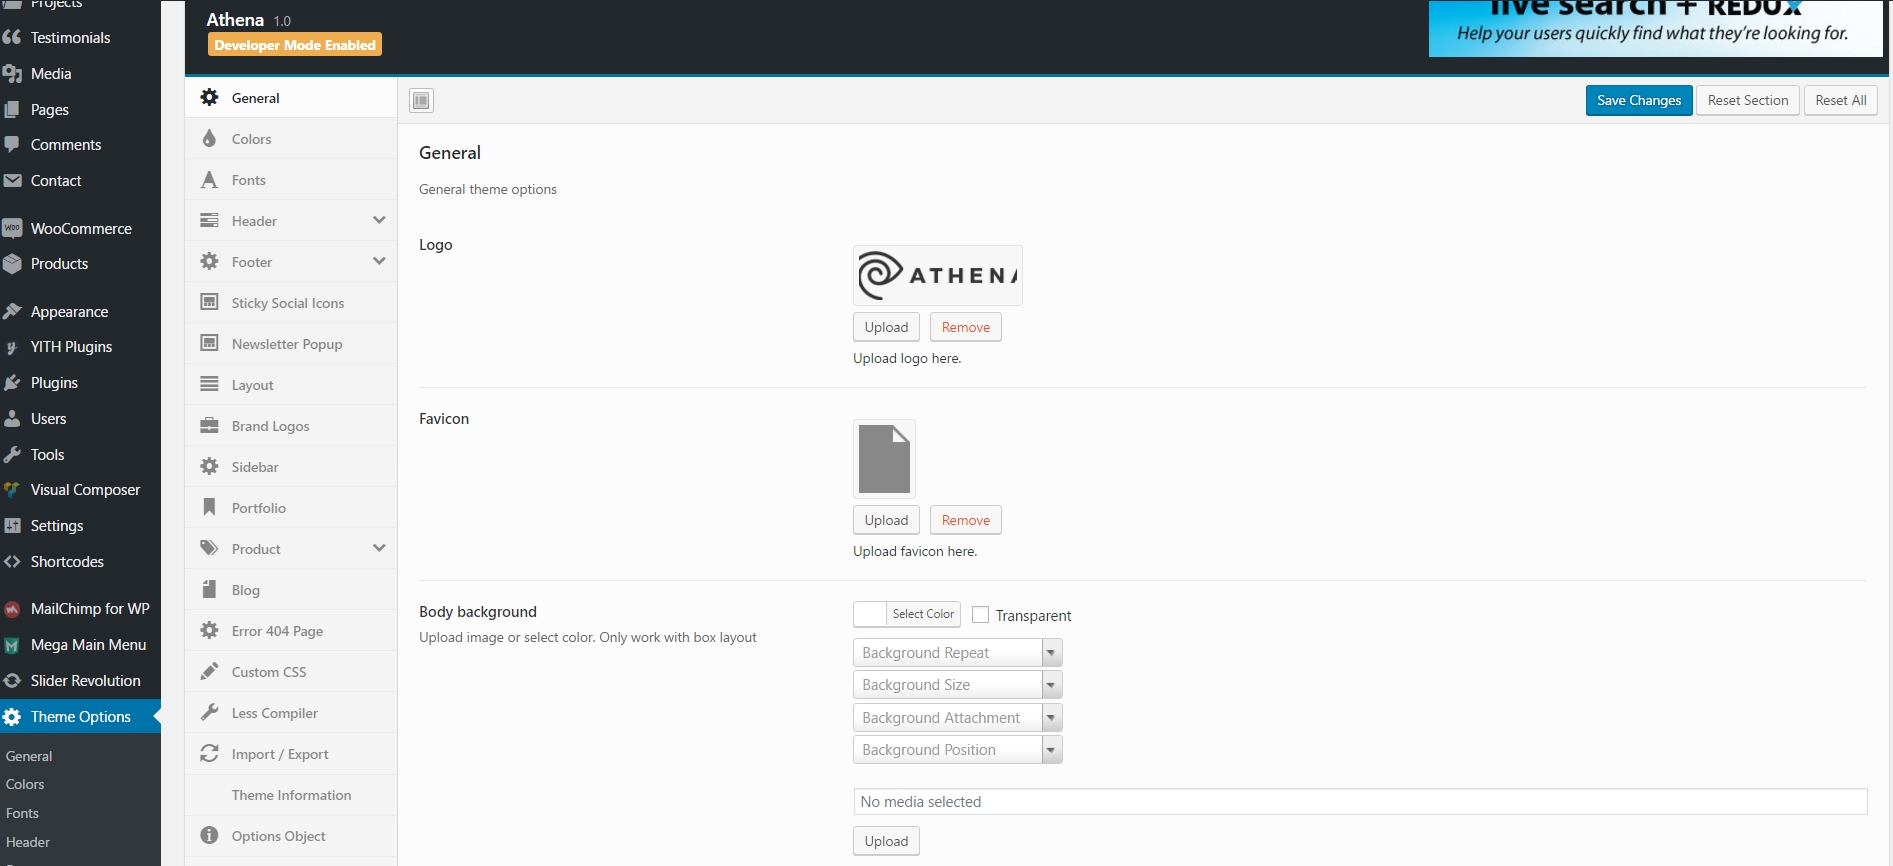
- General: In General tab, we can upload logo images, favicon icon for the website. We recommend logo image in .PNG file format for all logo images. For the favicion, use an image in .ICO file format, the image size is 16x16 pixels.
- Color: manage your site color
- Header:In this tab, we can select header layout, there are 3 layouts of header. We can also change the mobile menu label, enter phone, email, select top menu ....
- Footer: we can select footer layout but In this theme have only layout footer, enter copyright information, payment icons, newsletter and select menus for footer..
- Font: Click on "Fonts" tab to change font for text, heading, menu. There are some options to select for each font like font family, back up font family, font weight and style, font size, line height, color. We can use default options or change any font like you need. If we want to restore default options, click on "Reset Section" button. Watch the video below, we change some options then restore default.
- Layout we can select page layout is full width or box, select theme preset and turn off the style switcher.
- Brand Logos we can add and remove brand logo in this tab. Click on "Add Slide" button to add a new logo then click on "Upload" button upload brand logo image. We recommend the logo image size is 185x105 pixels. We can add Title and Link to a logo.
- Sidebar: Click on "Sidebar" tab to change position for each sidebar. Just select "Left" or "Right" position for sidebars.
- Portfolio: Click on "Portfolio" tab to change background, portfolio columns, projects per page, related projects title.
- Product: we can upload background for shop pages, change number of products per page, and add enter social sharing code. For social sharing code, go to http://www.sharethis.com or http://www.addthis.com/ then follow guide on website to create sharing button and get code.
- Blog: we can upload background for blog header, select blog layout, change readmore text and change options for posts carousel.
- Error 404 Page: Error 404 background: We can edit background color and background images show in this page.
- Custom CSS: In this tab we can add your custom css in right black box..
- Less Compiler: Turn on this option to apply all theme options. Turn of when you have finished changing theme options and your site is ready. We can turn on or turn off it.
- Import / Export: port and Export your Redux Framework settings from file, text or URL..
- Theme Information: We can see mini demo themes in this tab.
- Import / Export: port and Export your Redux Framework settings from file, text or URL..
- Options Object:Show Object in Javascript Console Object
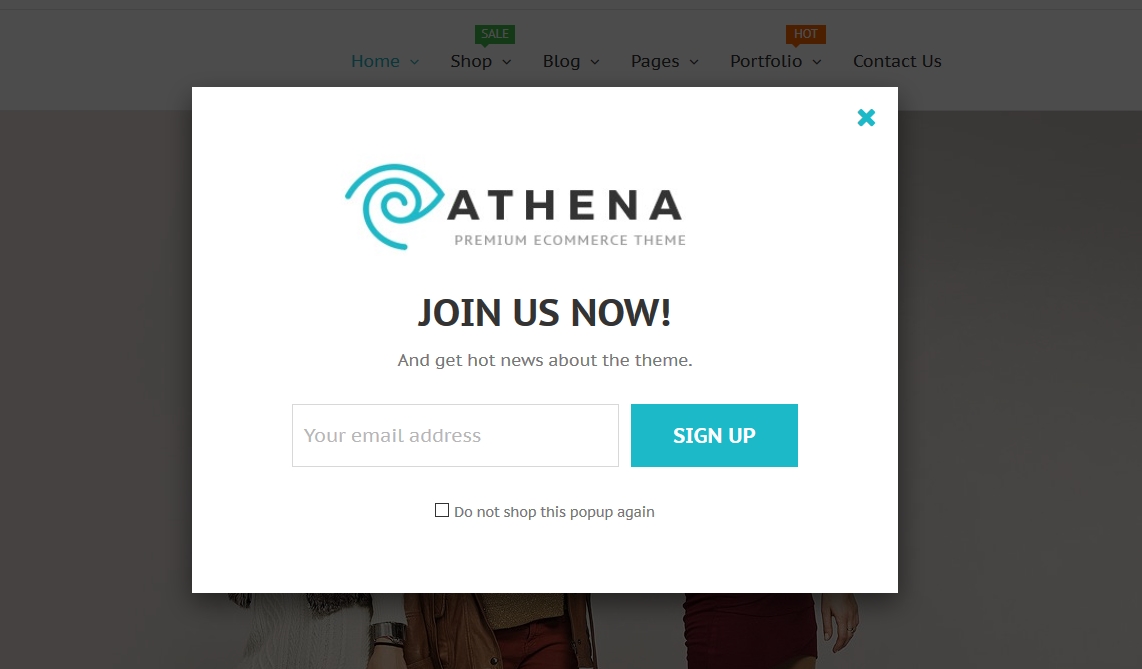
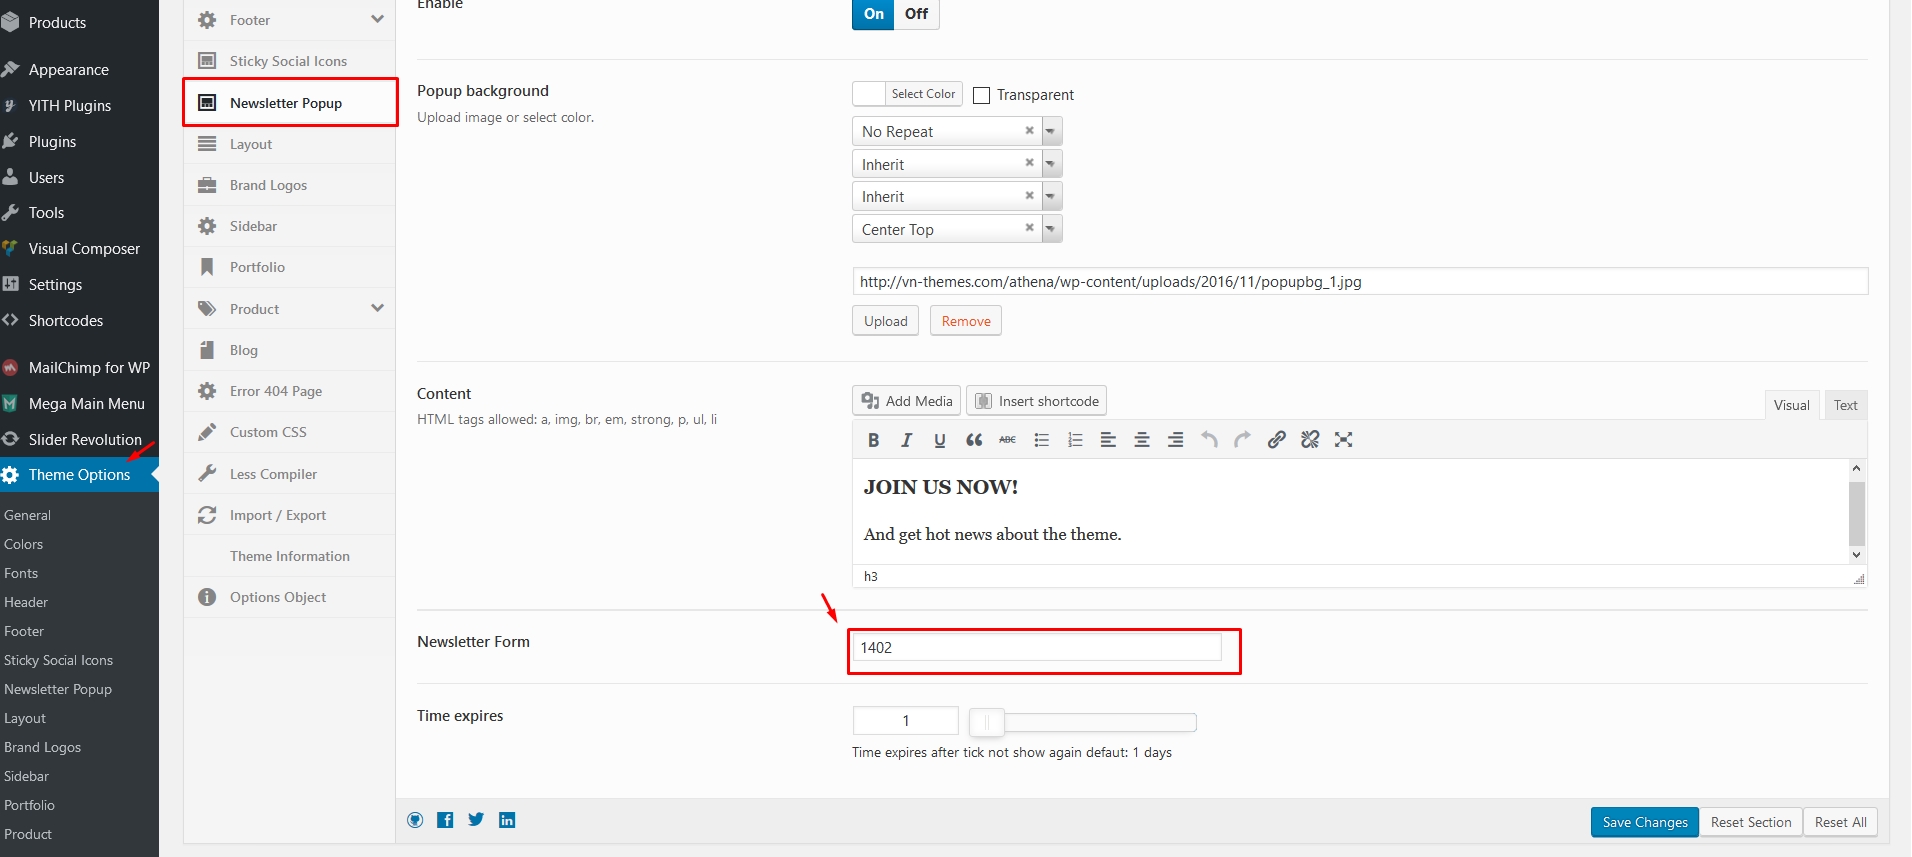
Newsletter Popup
Newsletter Popup settings
Widgets & Sidebars
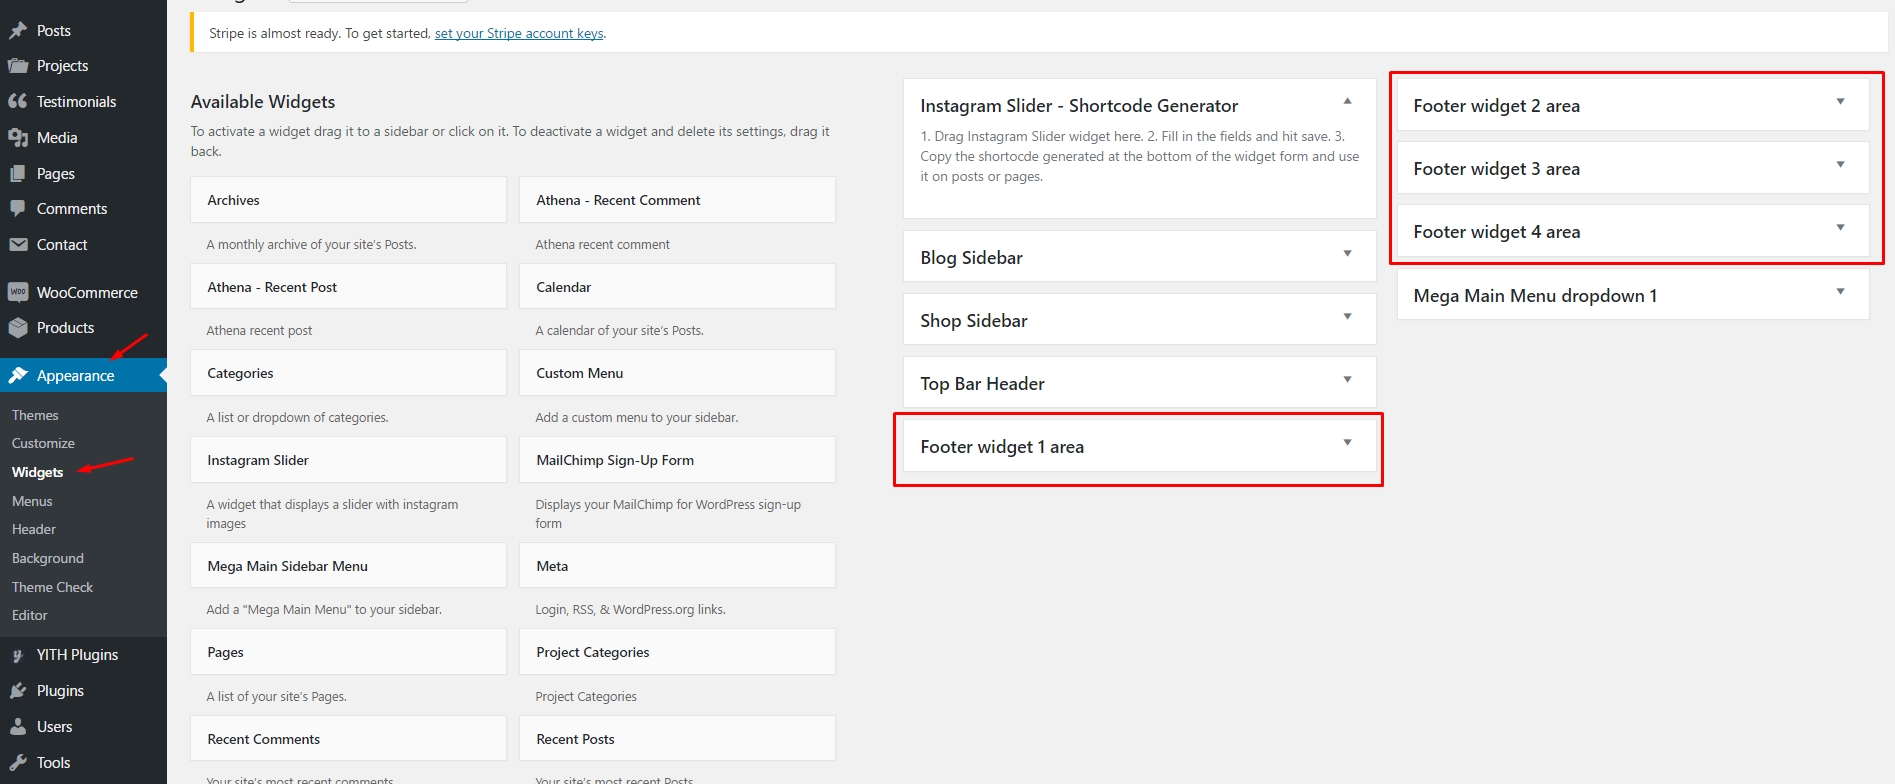
To manage widgets, you go to Appearance > Widgets. Just drag and drop widgets over to the sidebar.
Athena comes with many custom widgets and 5 sidebars. You can also easily add a new sidebar.
To create widgets for this theme quickly, we use a tool to import all widgets from exported files in sample-data/exported_files folder.
Login to your WordPress dashboard, navigate to Tools - Widget Importer & Exporter
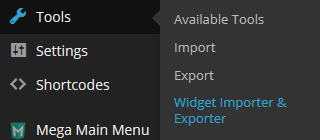
Click on "Browse..." or Choose File button then select Athena-widgets.wie, click on Import Widgets to finish.

Header
The header is probably one of the first things you will want to setup. It includes the logo, favicon, menu and other things. The following sections will explain how to set up and customize header.
Adding The Logo & Favicon
Follow the steps below to set up the logo & favicon:
- Navigate to Theme Options. You select General tab
- Click on the Upload button and choose a file from your library
- You can also add the image link into the input field
Setting Up Header
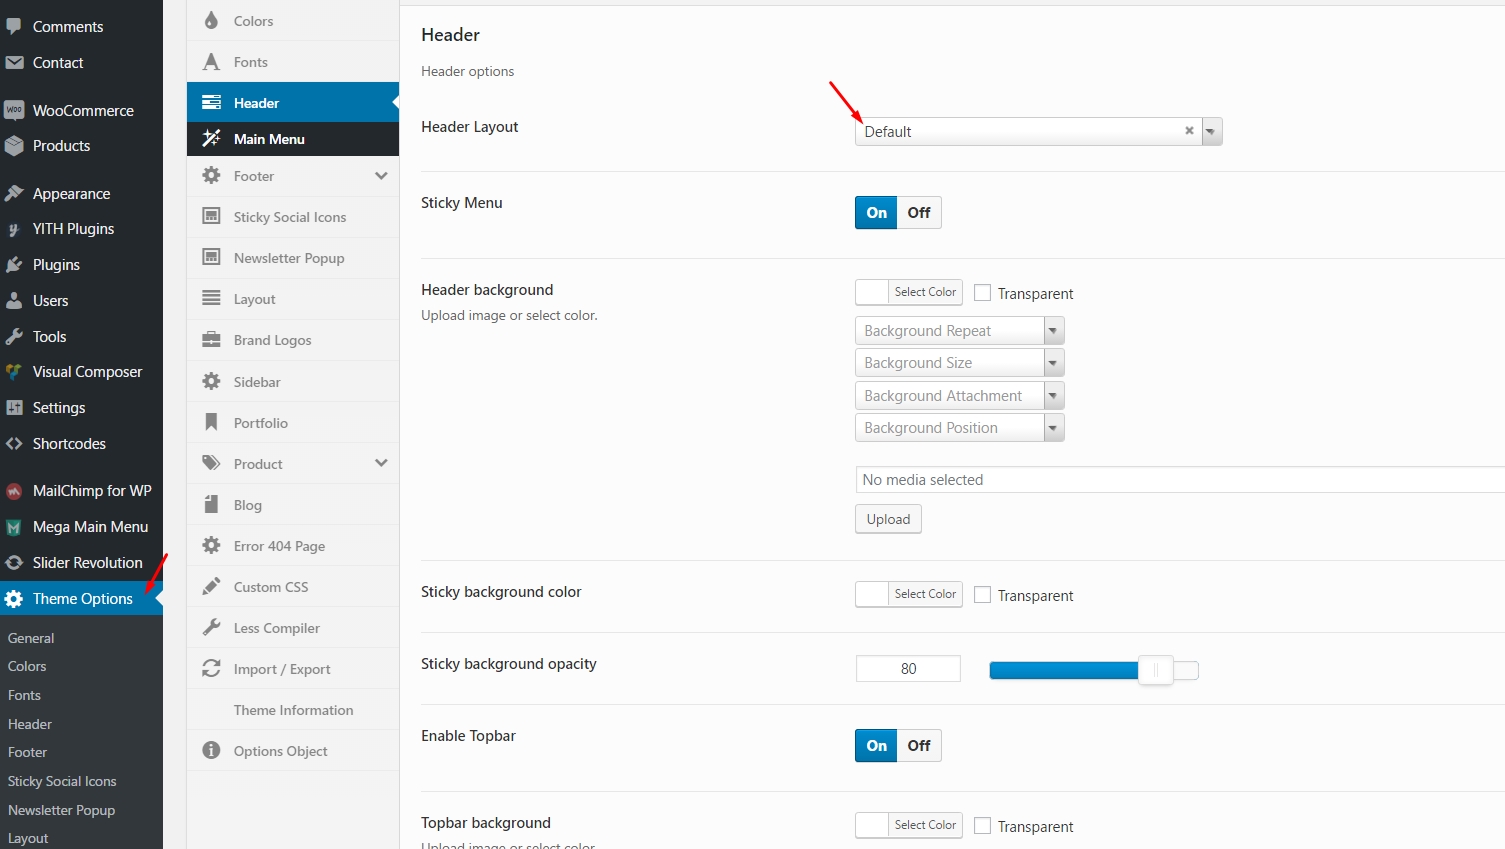
To set up your header, you go to Appearance > Theme Options > Header tab. In there, you can choose the Header Layout, configure your breadcrumb and other options.
Header Layout
Athena comes with 3 different header layouts. Just choose one of our header layouts for your site.
We can edit text "Welcome Athena Store!" type text box "welcome message" in this tab.
We can sellect Topmenu show like demo
Header Customization
If you want to customize the theme, you should create the child theme before making any changes. Please note that you have to install the required plugins before activating the child theme. Otherwise, you will get an error if you install the plugins in Appearance > Install Plugins page.
You can find the sample child theme package (Athena-child.zip file) in your downloaded file (you have to download All files & documentation).
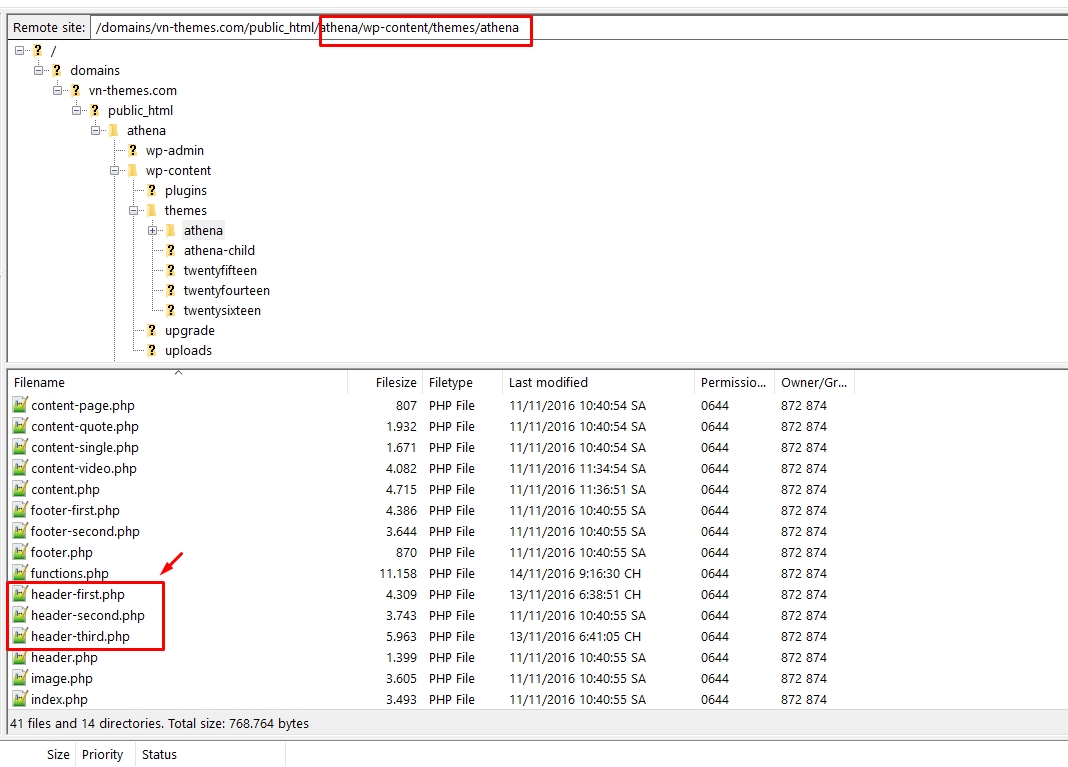
Follow the steps below to override header template:
- Copy the template file from the parent theme folder to the child theme folder
- Edit the template file in the child theme folder
Footer
Athena allows you to create unlimited footer layouts
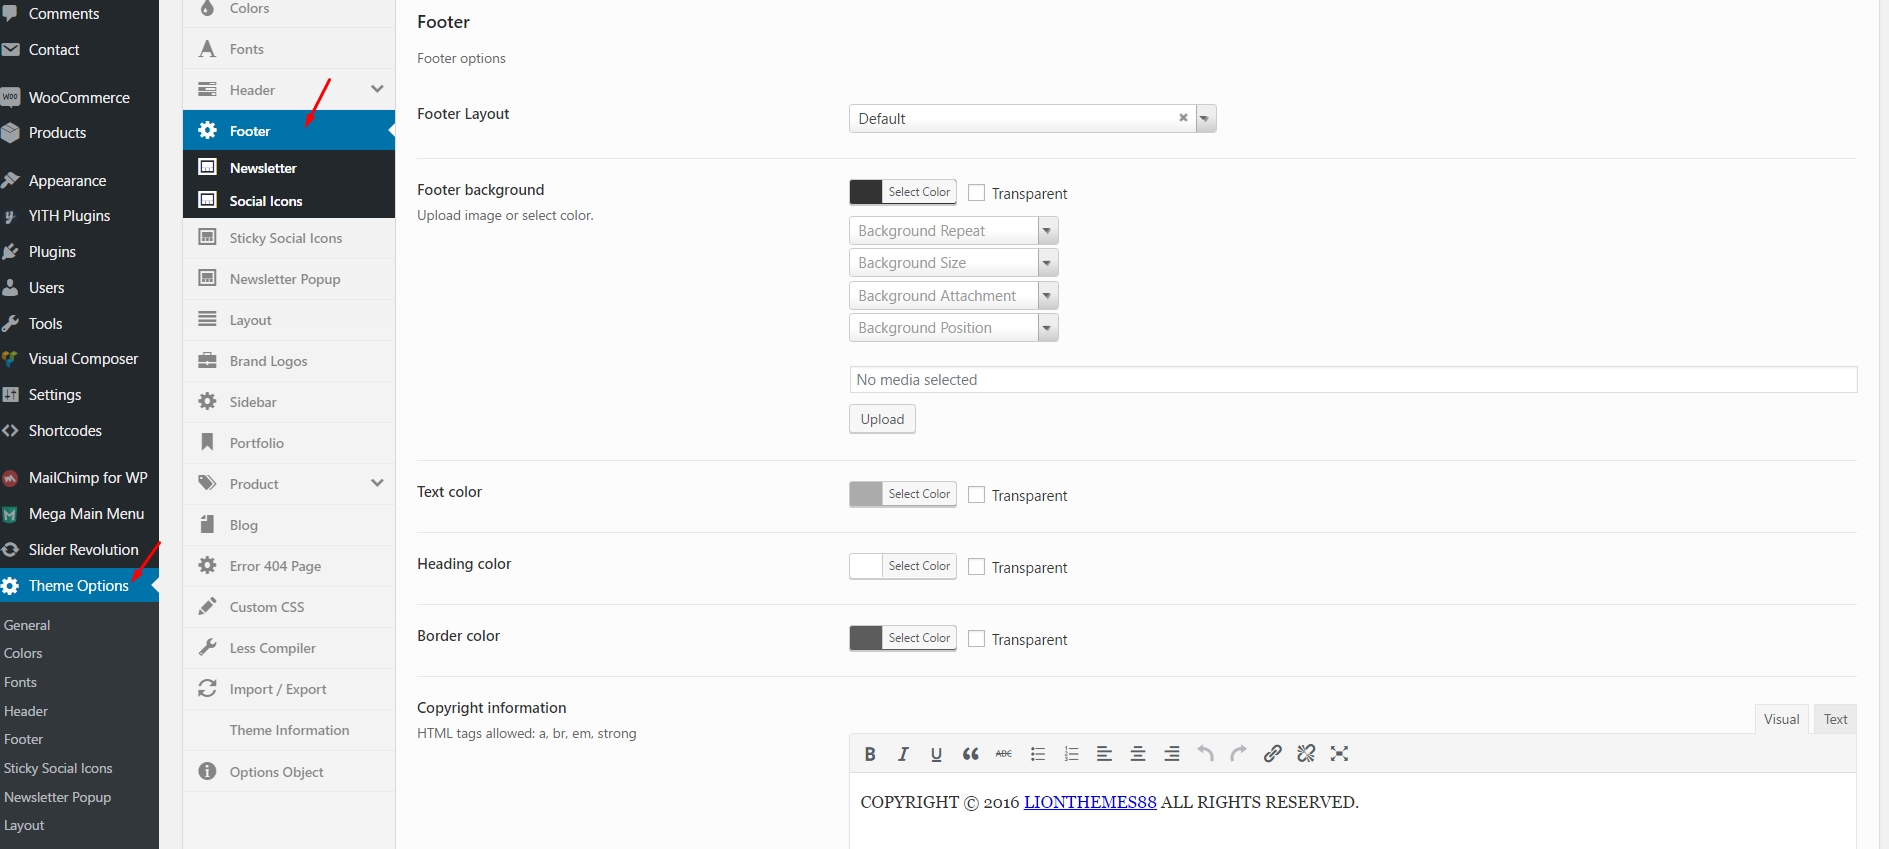
Admin page-> Themes Options-> Footer
Footer Layout : Athena include only layout footer.
Bottom menu : Footer naviagation links.
Copyright information : We can insert coppyright in this field.
Payment icons : We can edit images payment methods in this tab.
Widget footer menu : We can edit Widget footer menu in this Widget footer.
Menu
Login to your WordPress dashboard, navigate to Appearance - Menus, create menus for this theme. If you are a WordPress beginer, you can read Menu document to know how to work with Menu.
Before creating a new menu, you can Create some Pages for portfolio, contact, blog, shop... this will help you create menu quickly.
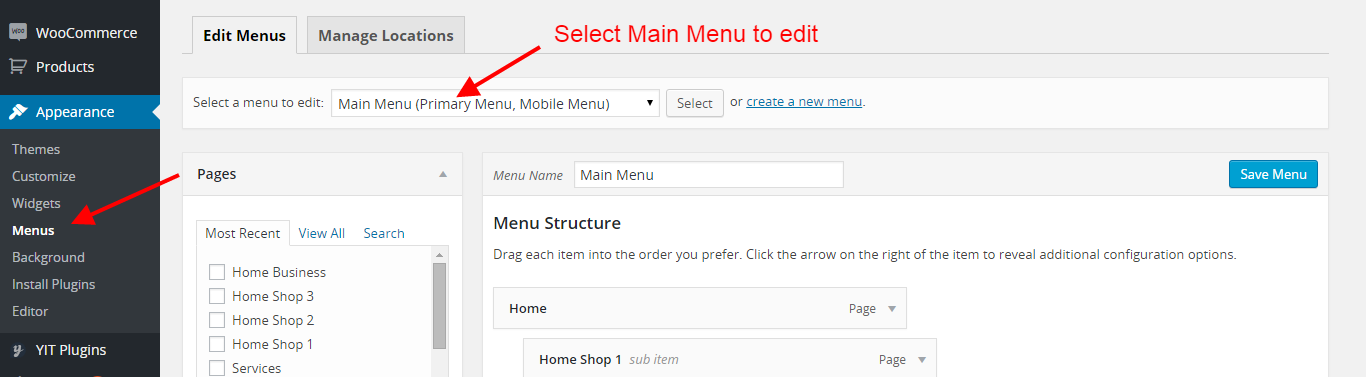
Primary Menu

Select Main Menu to edit, Click to Primary Menu and Mobile Menu, Save Menu to finish
The Primary menu has a complex structure, with many levels of sub-menu. Create your own menu structure by drag and drop to make sub menus.
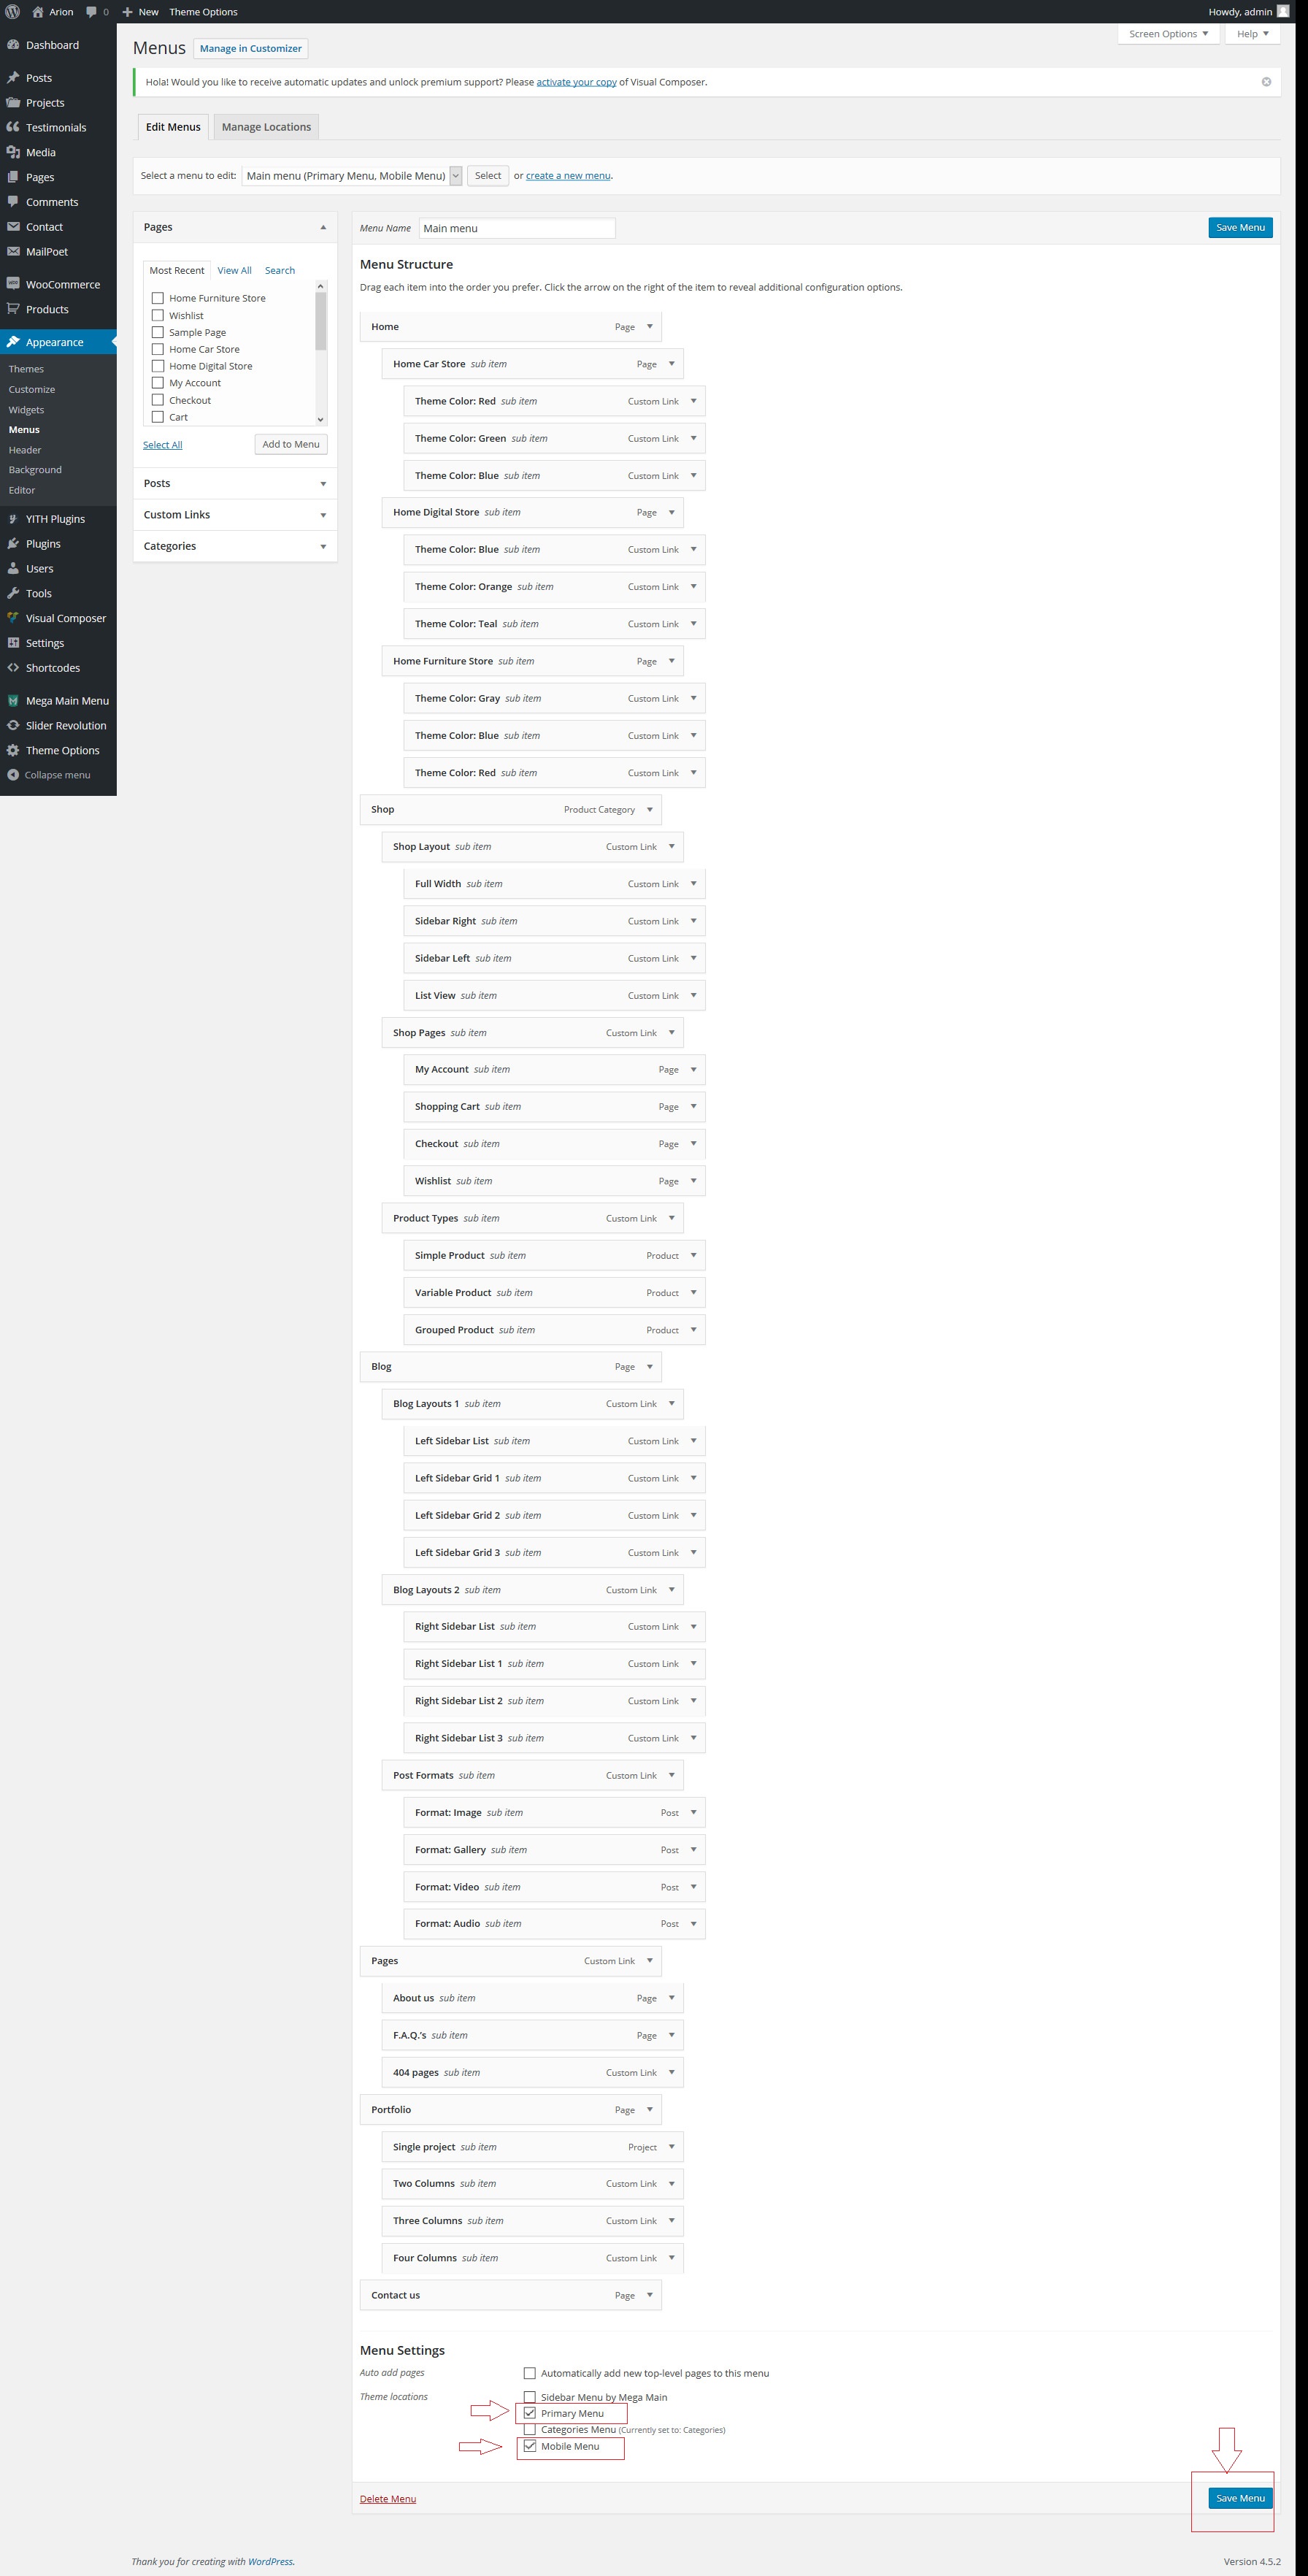
Now we need active Mega Main Menu for Primary Menu
Click on Mega Main Menu link
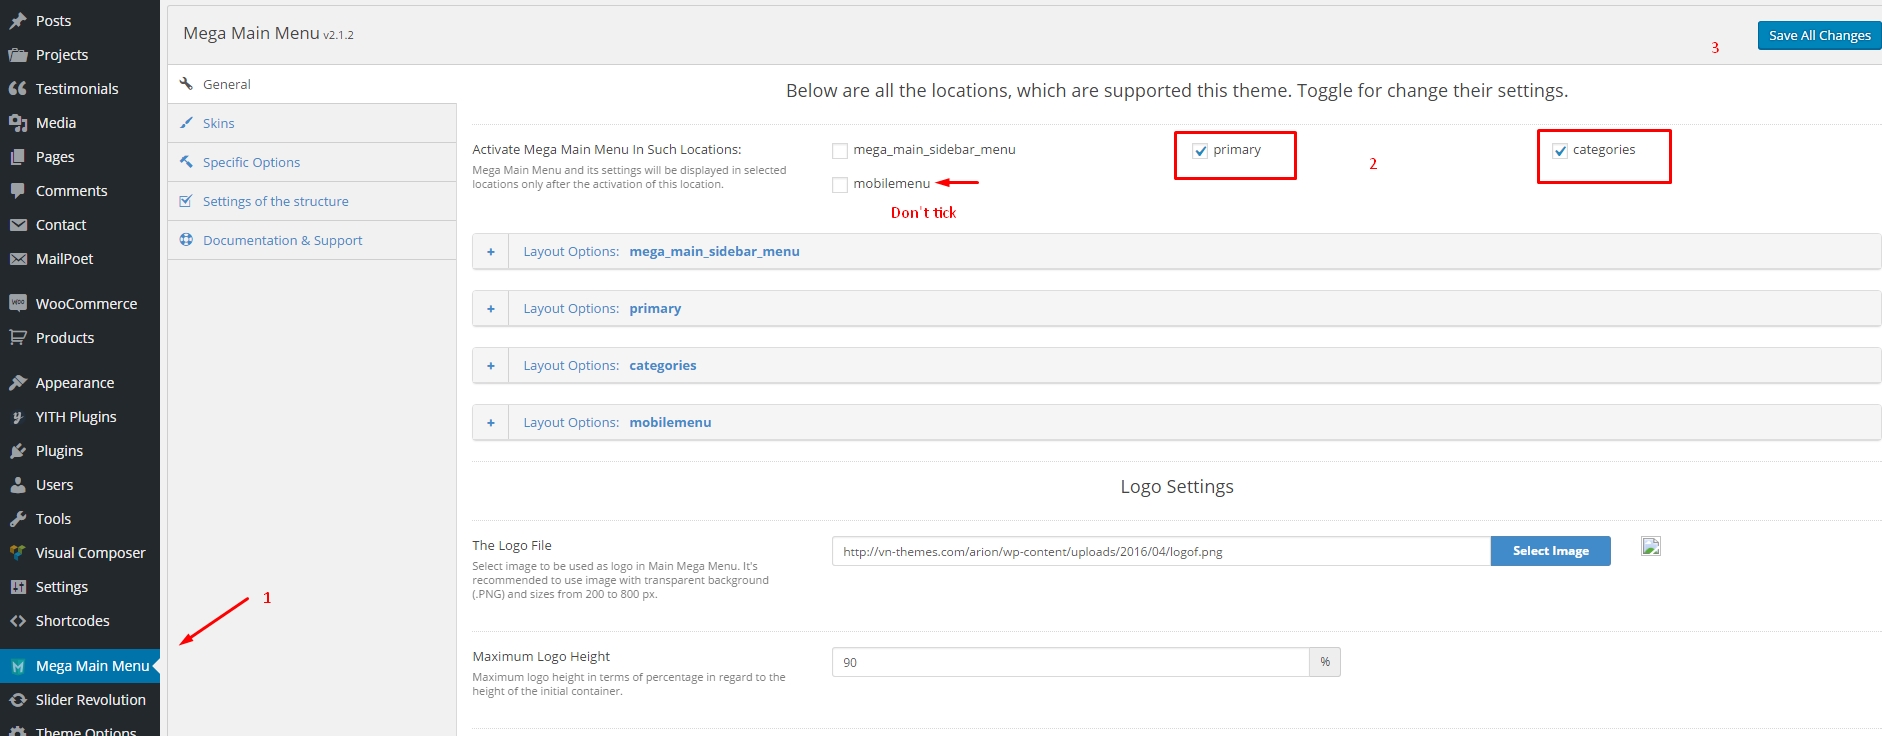
Check on primary then click on Save All Changes button.
Click to open Layout Options for primary, topmenu and
Uncheck on "Company Logo" and "Searchbox"
Check this option to make the menu sticky. Incompatible with the "Vertical" menu. Sticky do not working on mobile devices. If the menu will be is sticky on mobile devices when you open it - you can not click on the last item, because it will always be outside the screen.
Now go back to edit Primary Menu
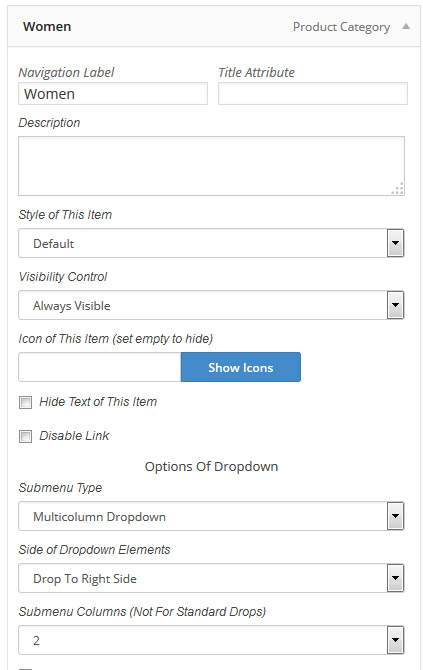
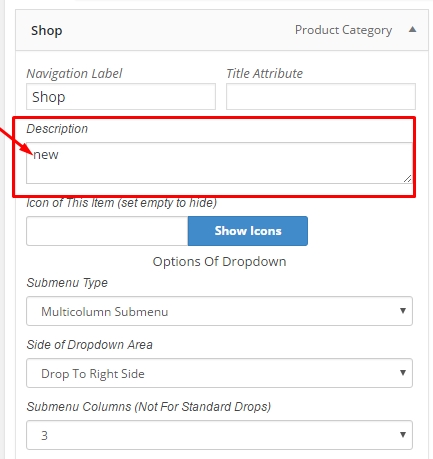
To make a menu item has sub menus in multiple columns, click on menu item to open menu item settings and select Submenu Type is Multicolumns Dropdown, select Side of Dropdown Elements and Submenu Columns.
Label Description

Pages
Athena comes with Visual Composer plugin and powerful. The following sections will explain how to create a new page and make it look like our demo. If you use our One Click Import Demo functionality, you can ignore this.
Create A New Page
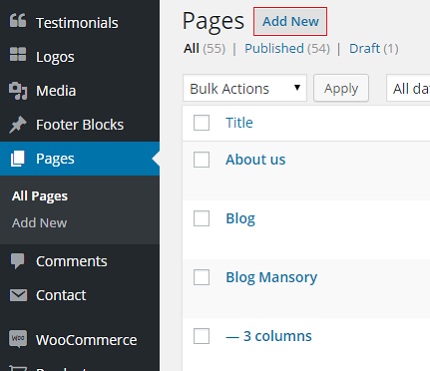
Follow the steps below to create a new page:
- In admin panel, go to Pages and click on the Add New button
- Input the page title and page content
- On the Page Attributes section, choose the page template from dropdown list
Home Pages
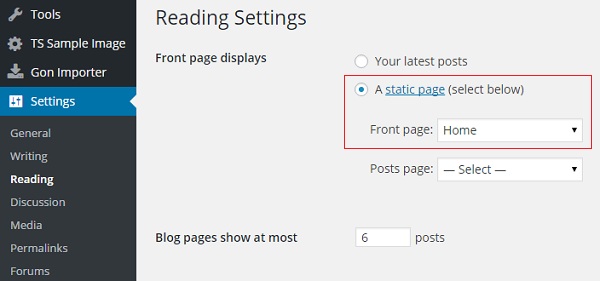
Setting up a home page
- In admin panel, you go to Settings > Reading.
- You choose the A static page(select below) option.
- Select a page from dropdown list of the Front page option.
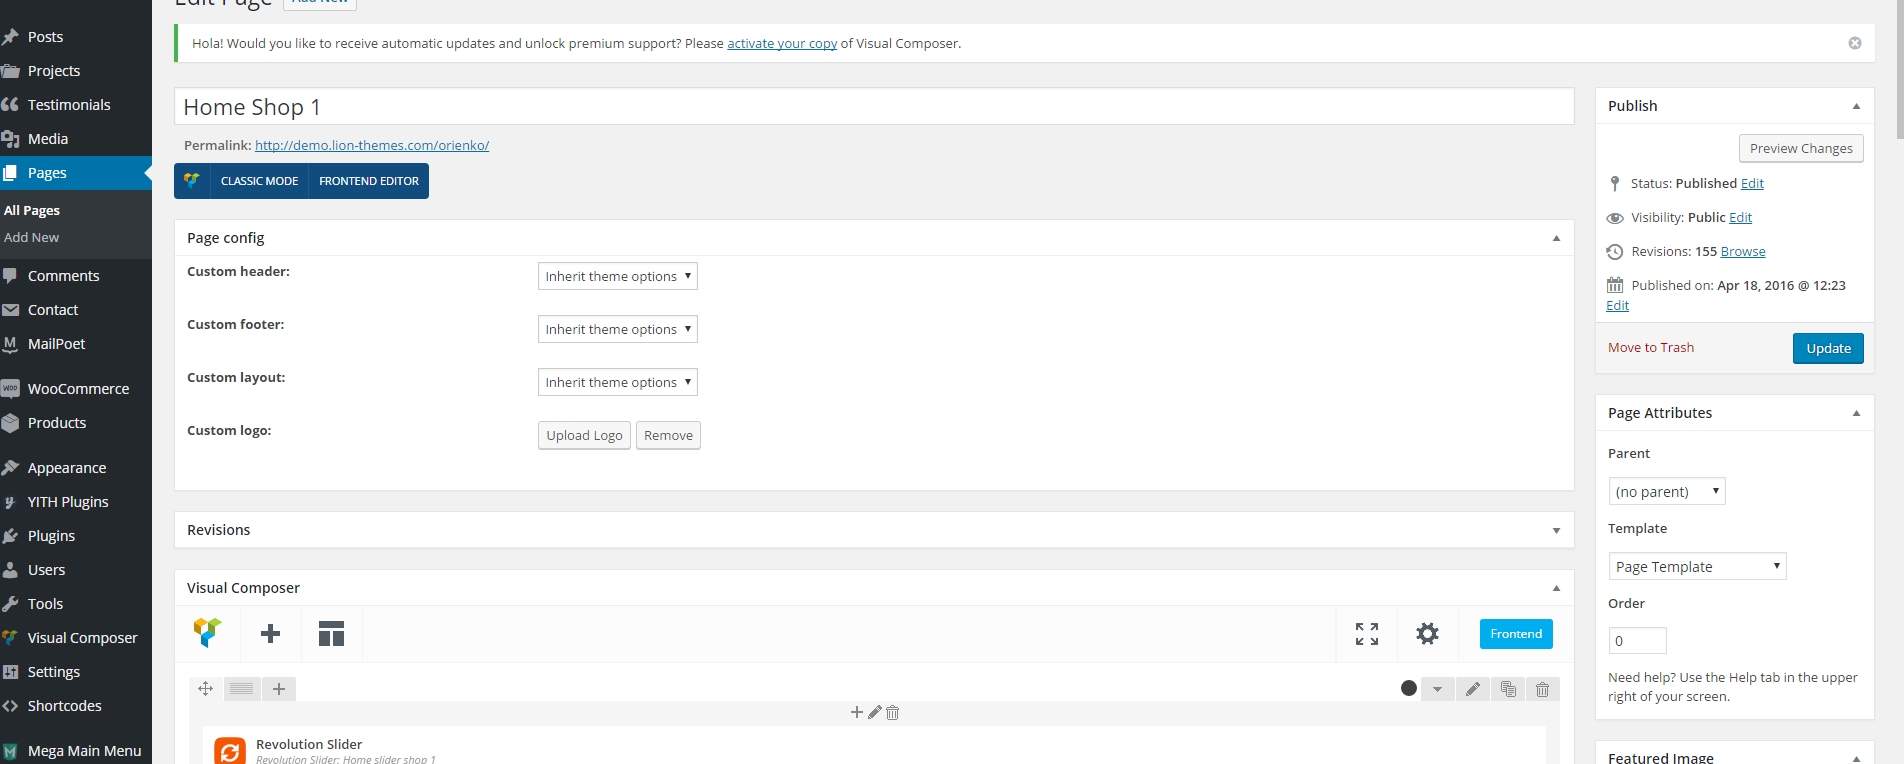
Page config
you can customize the header , footer , logo to each page in config
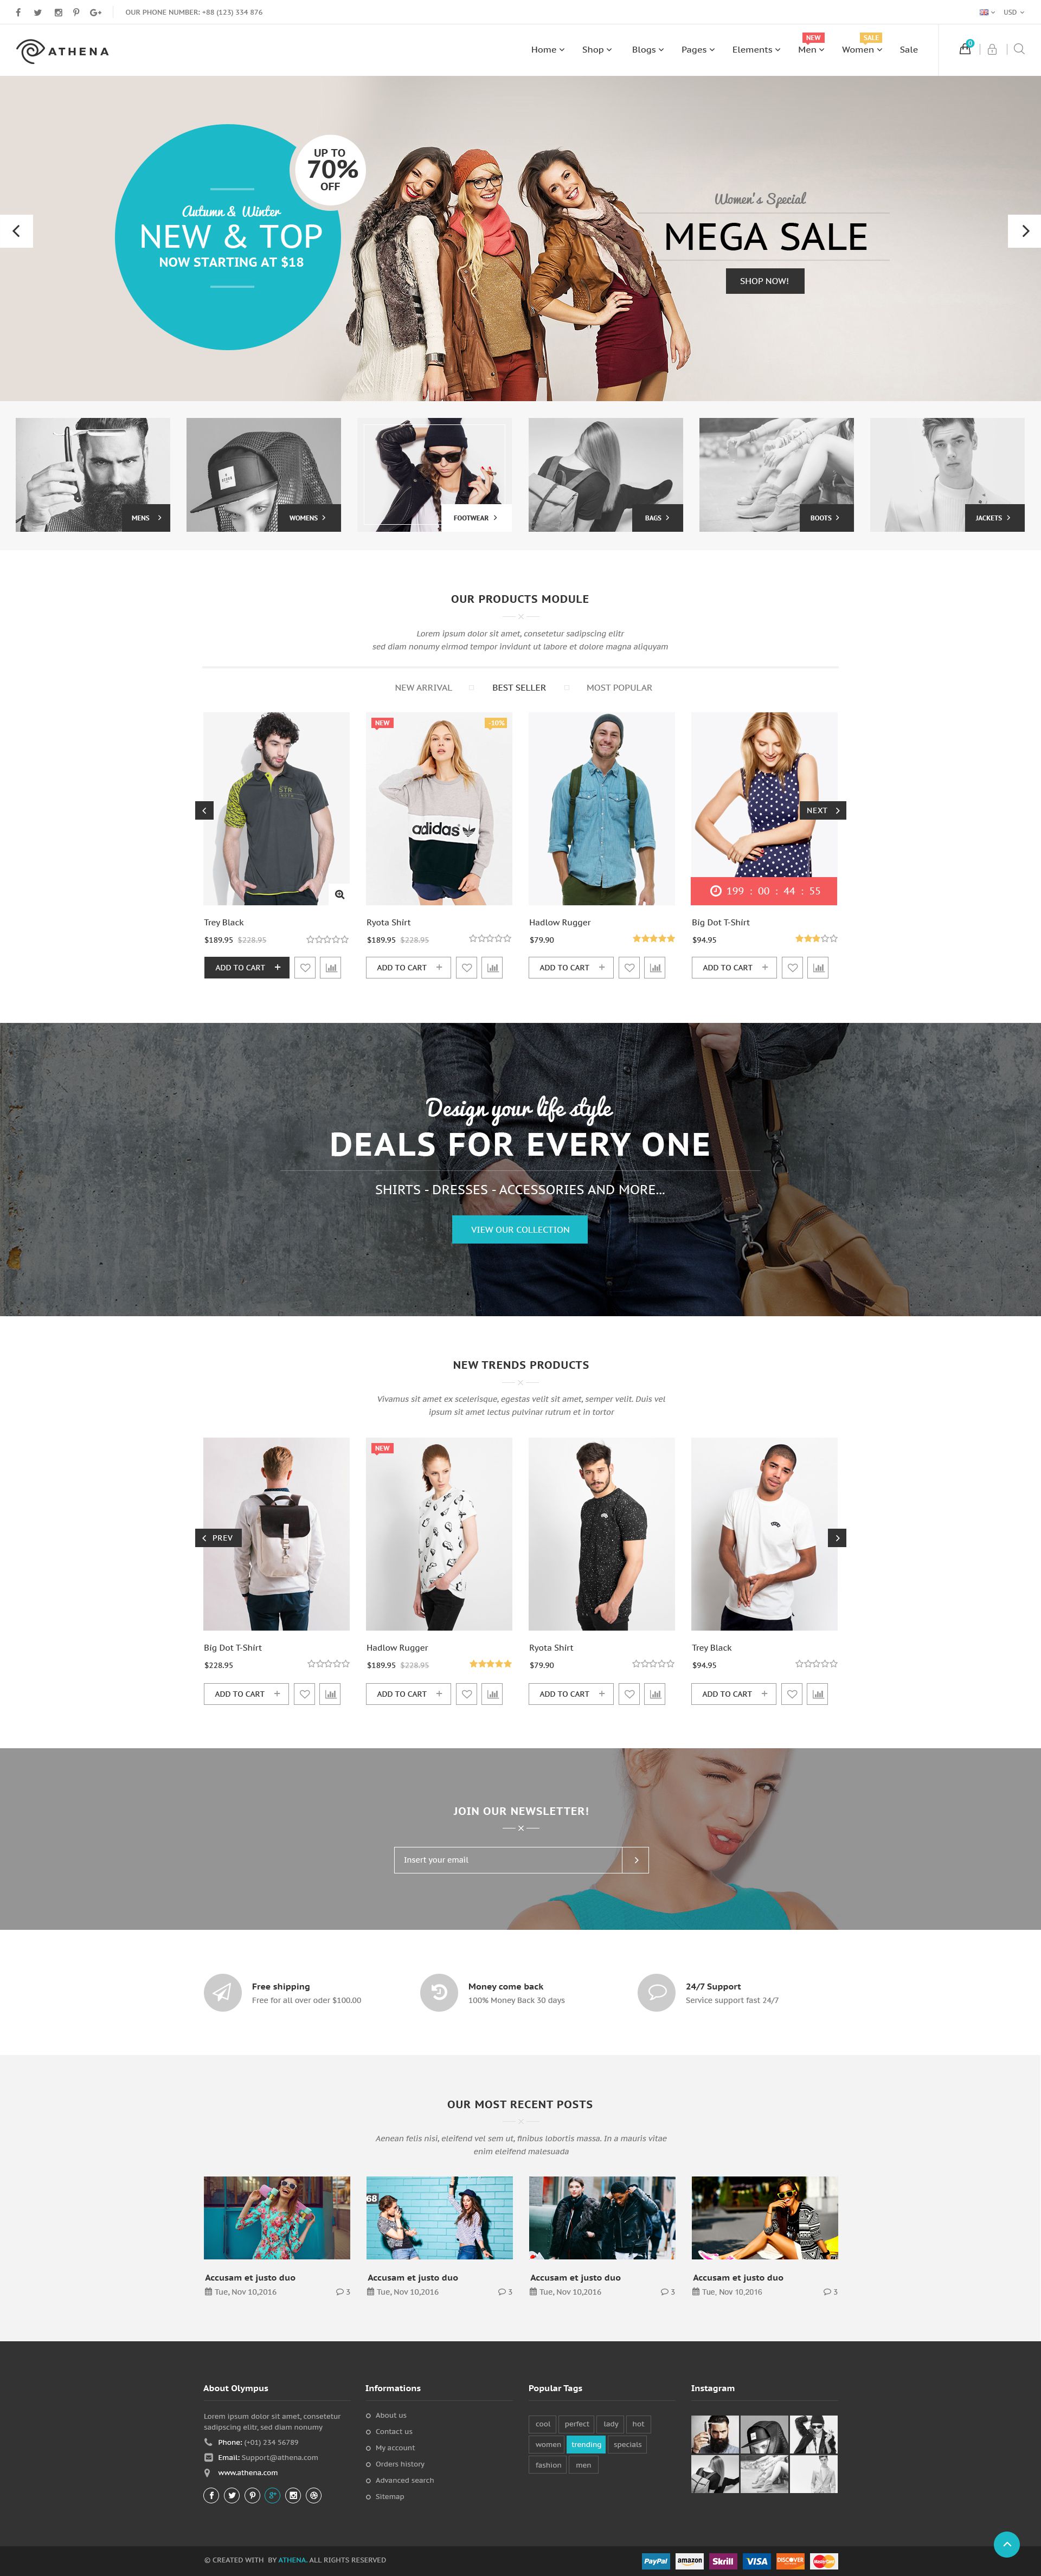
Home fashion 1(Default Store)
Page Content:
Page Configurations:
- Page Header: "Custom header:"-> Header first (Default)( We can select option header style If we want.)
- Page Footer: "Custom Footer:"-> Header Footer (Default)( We can select option header style If we want.)
- Custom layout:: Full(Default)
- Custom Logo::We can select option logo style If we want
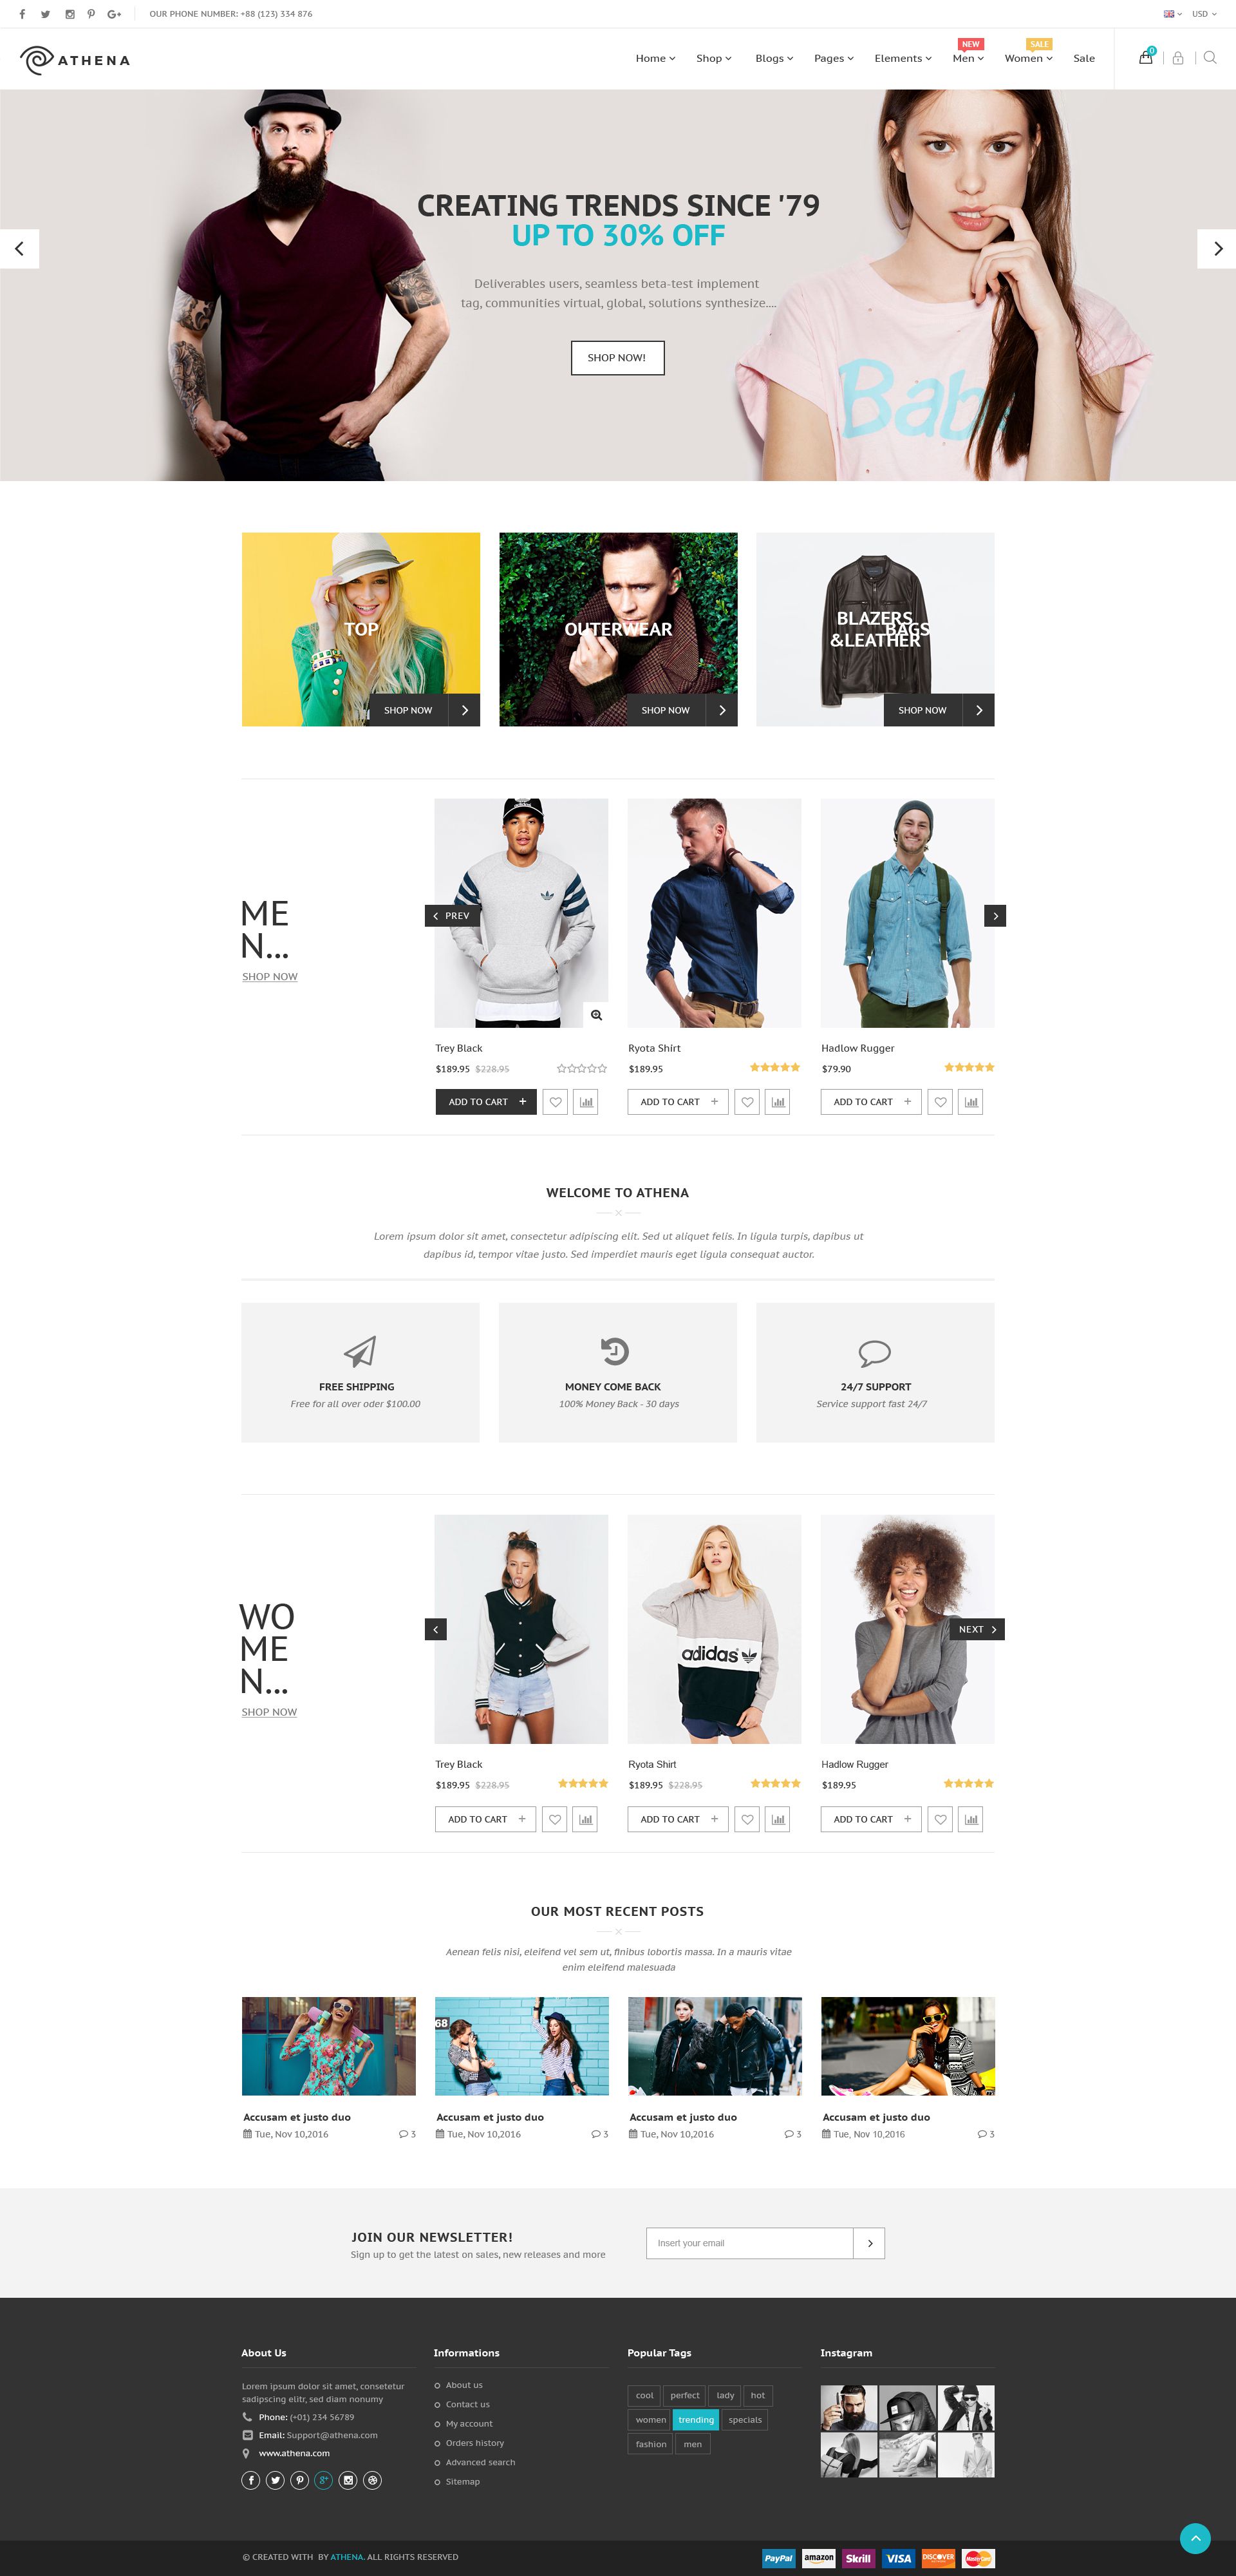
Home fashion 2
Page Content:
Page Configurations:
- Page Header: "Custom header:"-> Header second( We can select option header style If we want.)
- Page Footer: "Custom Footer:"-> Header Footer (Default)( We can select option header style If we want.)
- Custom layout:: Full(Default)
- Custom Logo::We can select option logo style If we want
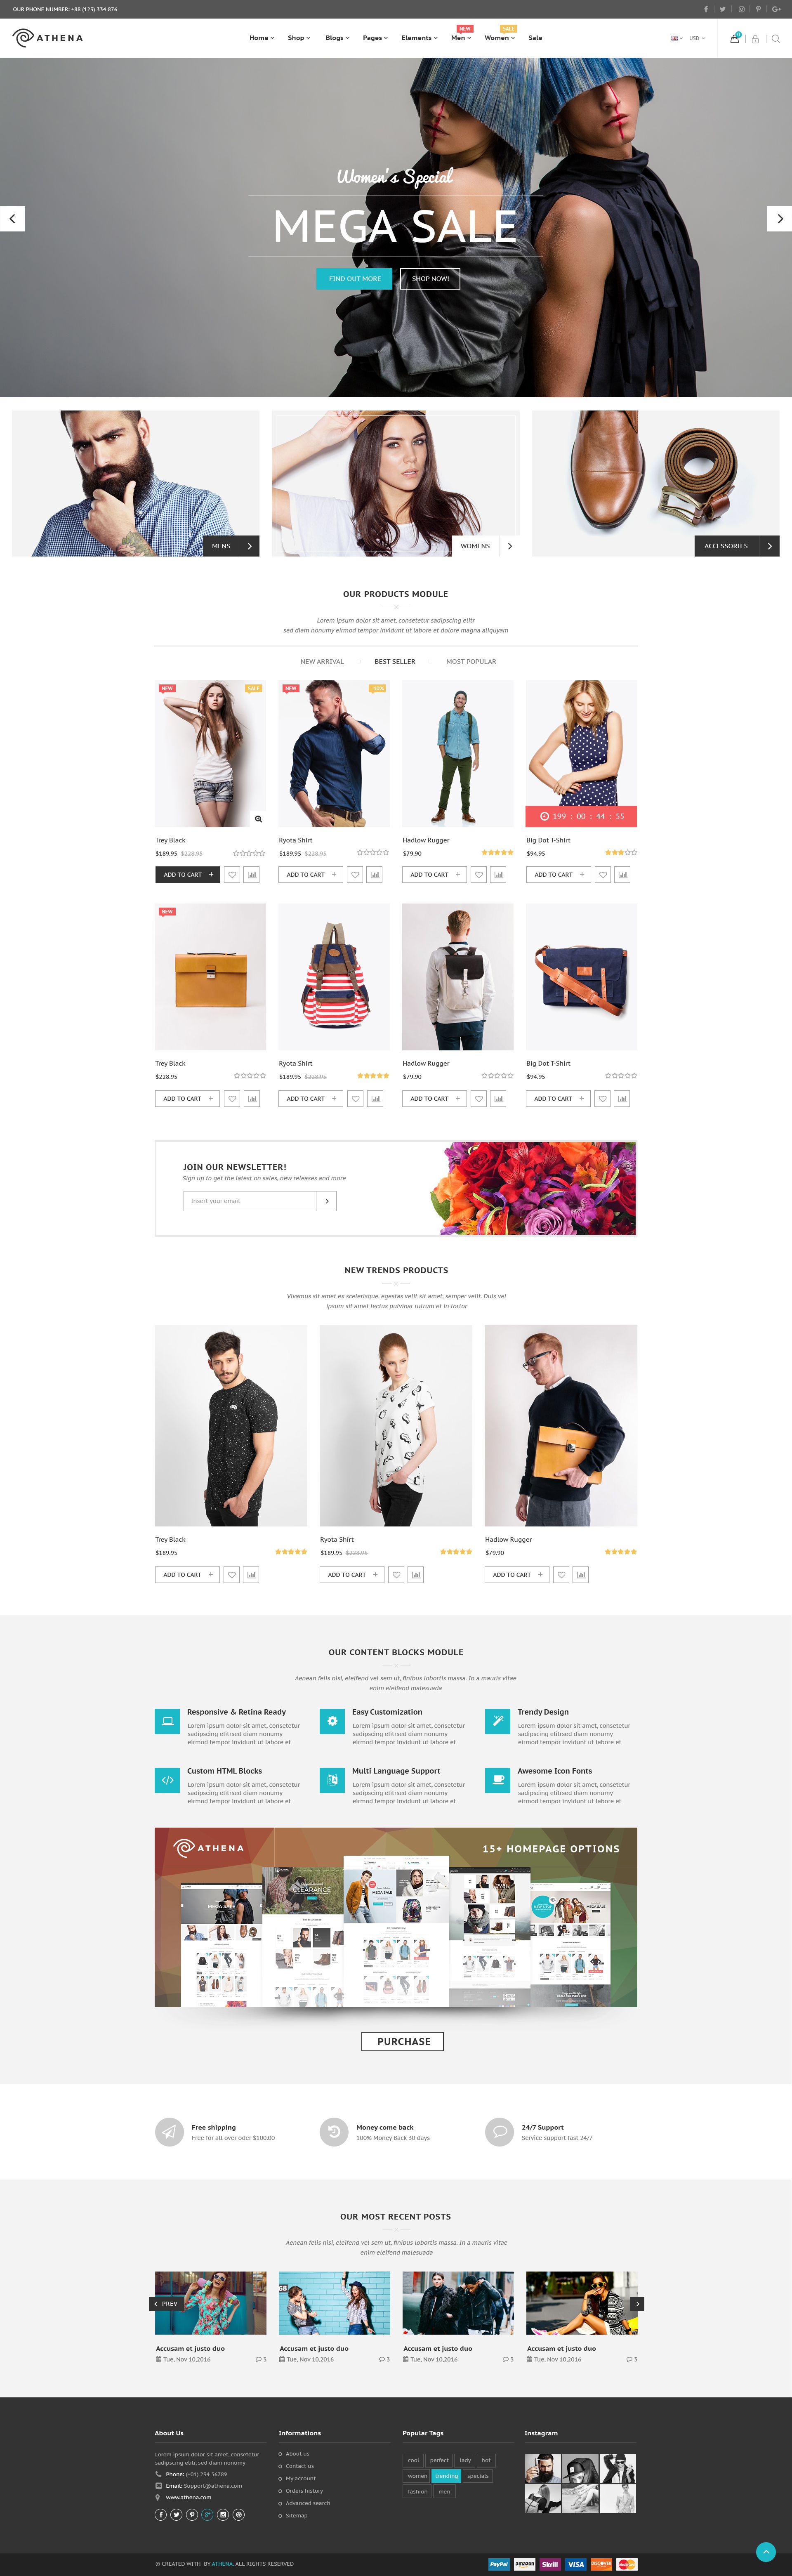
Home food
Page Content:
Page Configurations:
- Page Header: "Custom header:"-> Header third( We can select option header style If we want.)
- Page Footer: "Custom Footer:"-> Header second( We can select option header style If we want.)
- Custom layout:: Full(Default)
- Custom Logo::We can select option logo style If we want
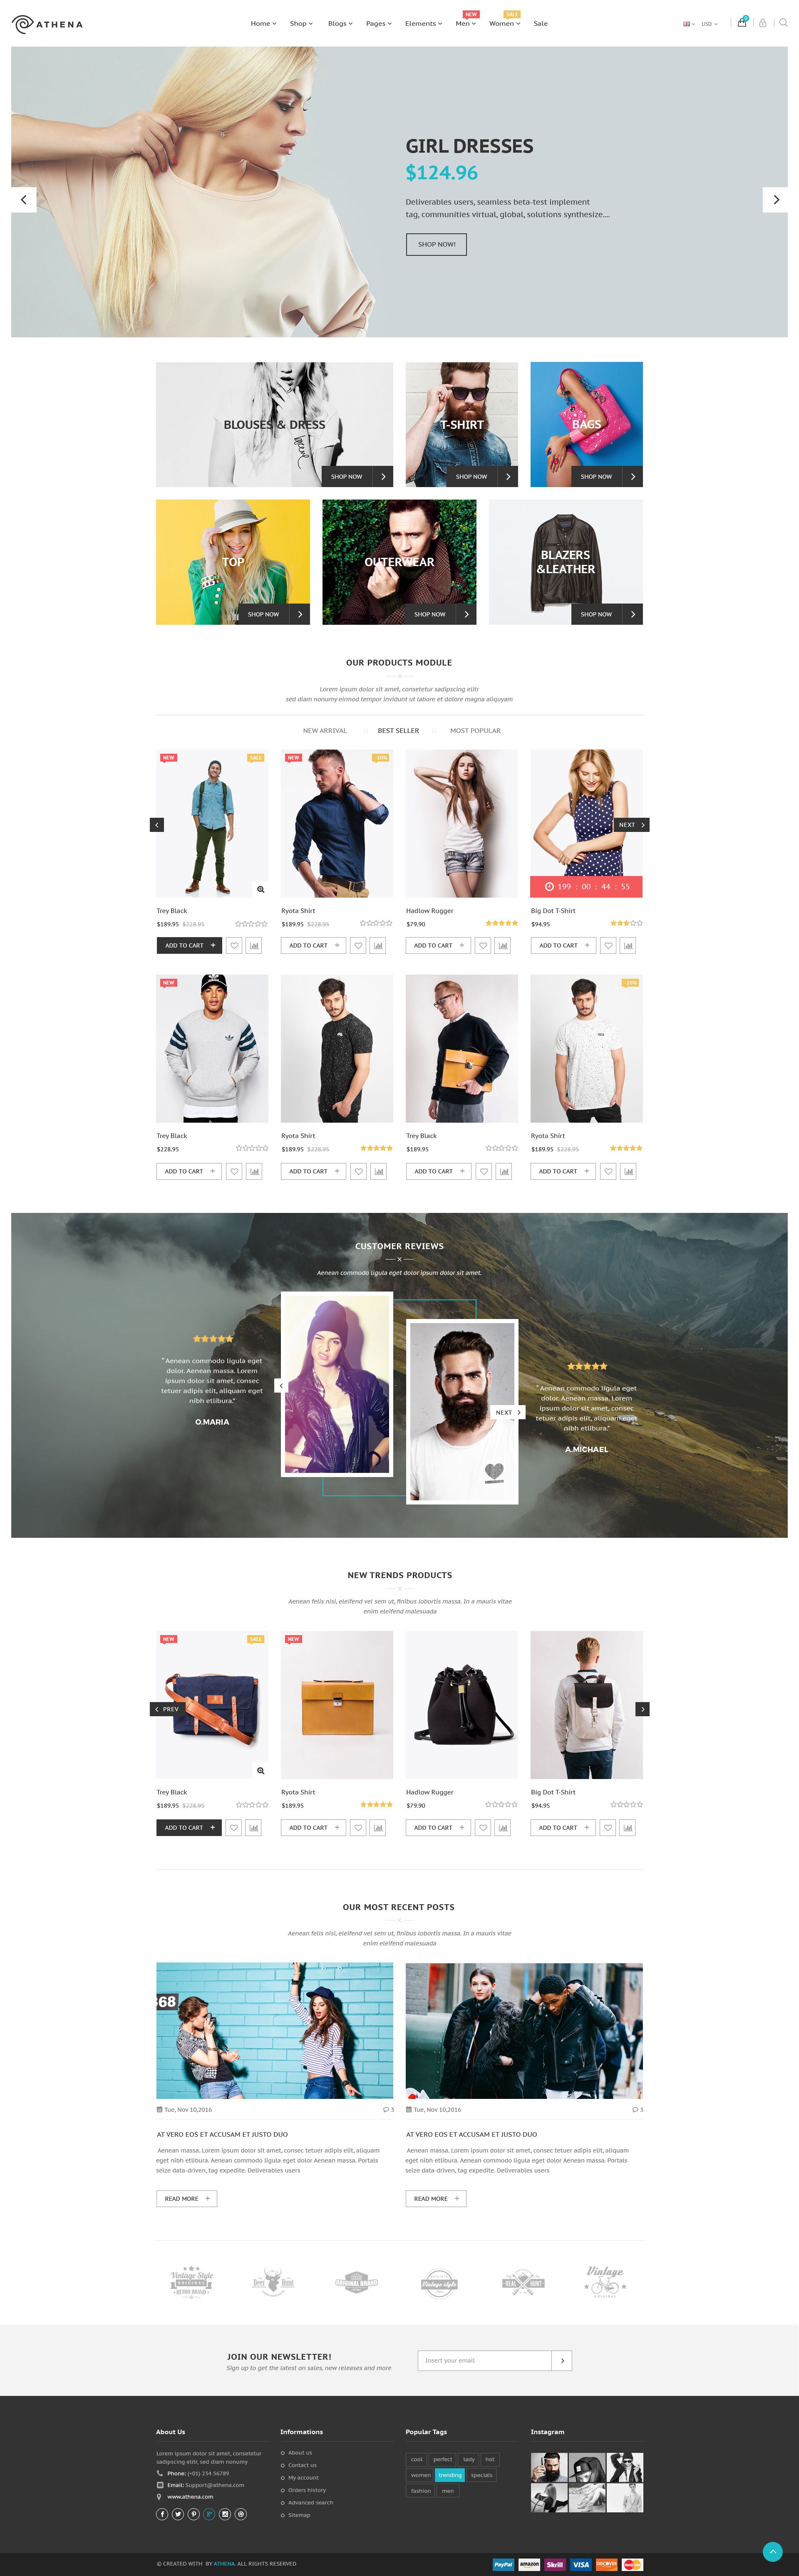
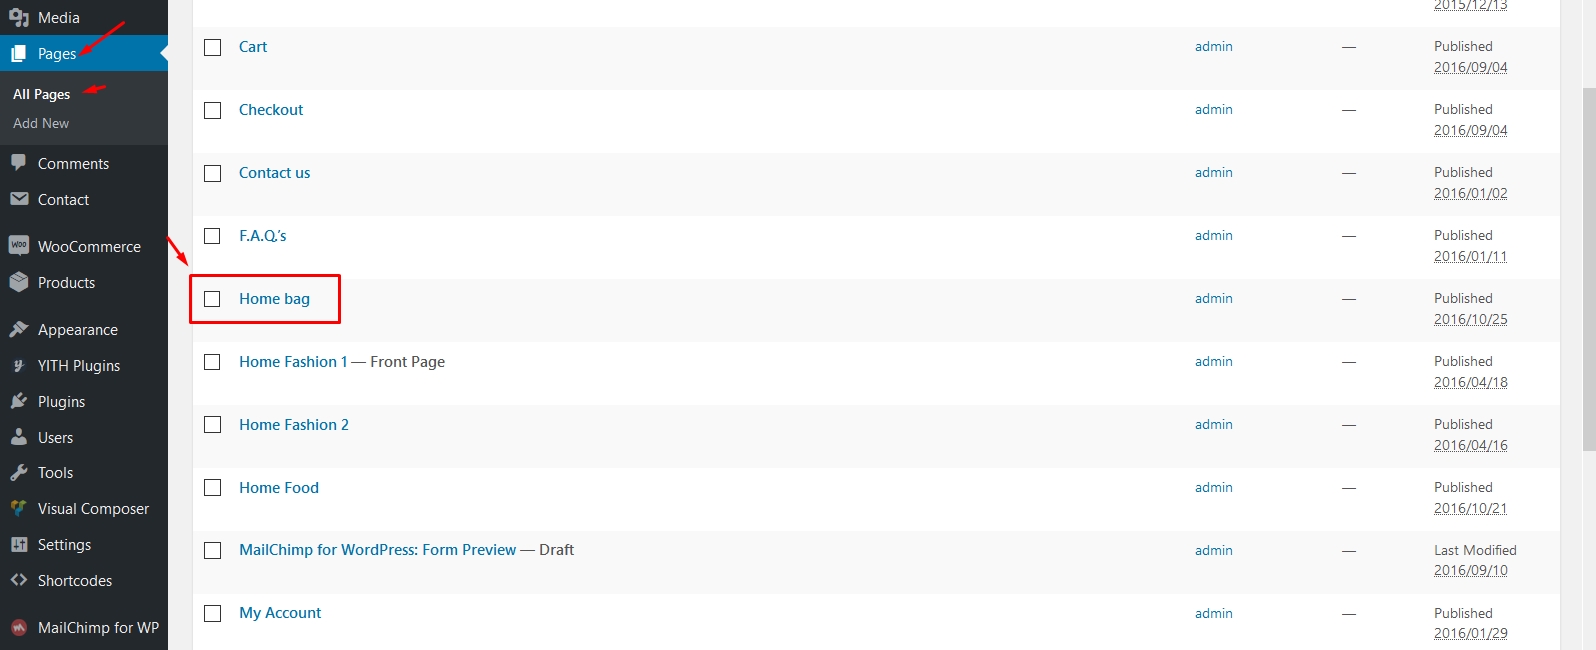
Home bag
Page Content:
Page Configurations:
- Page Header: "Custom header:"-> Header second( We can select option header style If we want.)
- Page Footer: "Custom Footer:"-> Header Footer (Default)( We can select option header style If we want.)
- Custom layout:: Full(Default)
- Custom Logo::We can select option logo style If we want
Contact Us
It is easy to make your contact page look like our demo. Simply copy the code below and paste into the page content (in the Text editor).
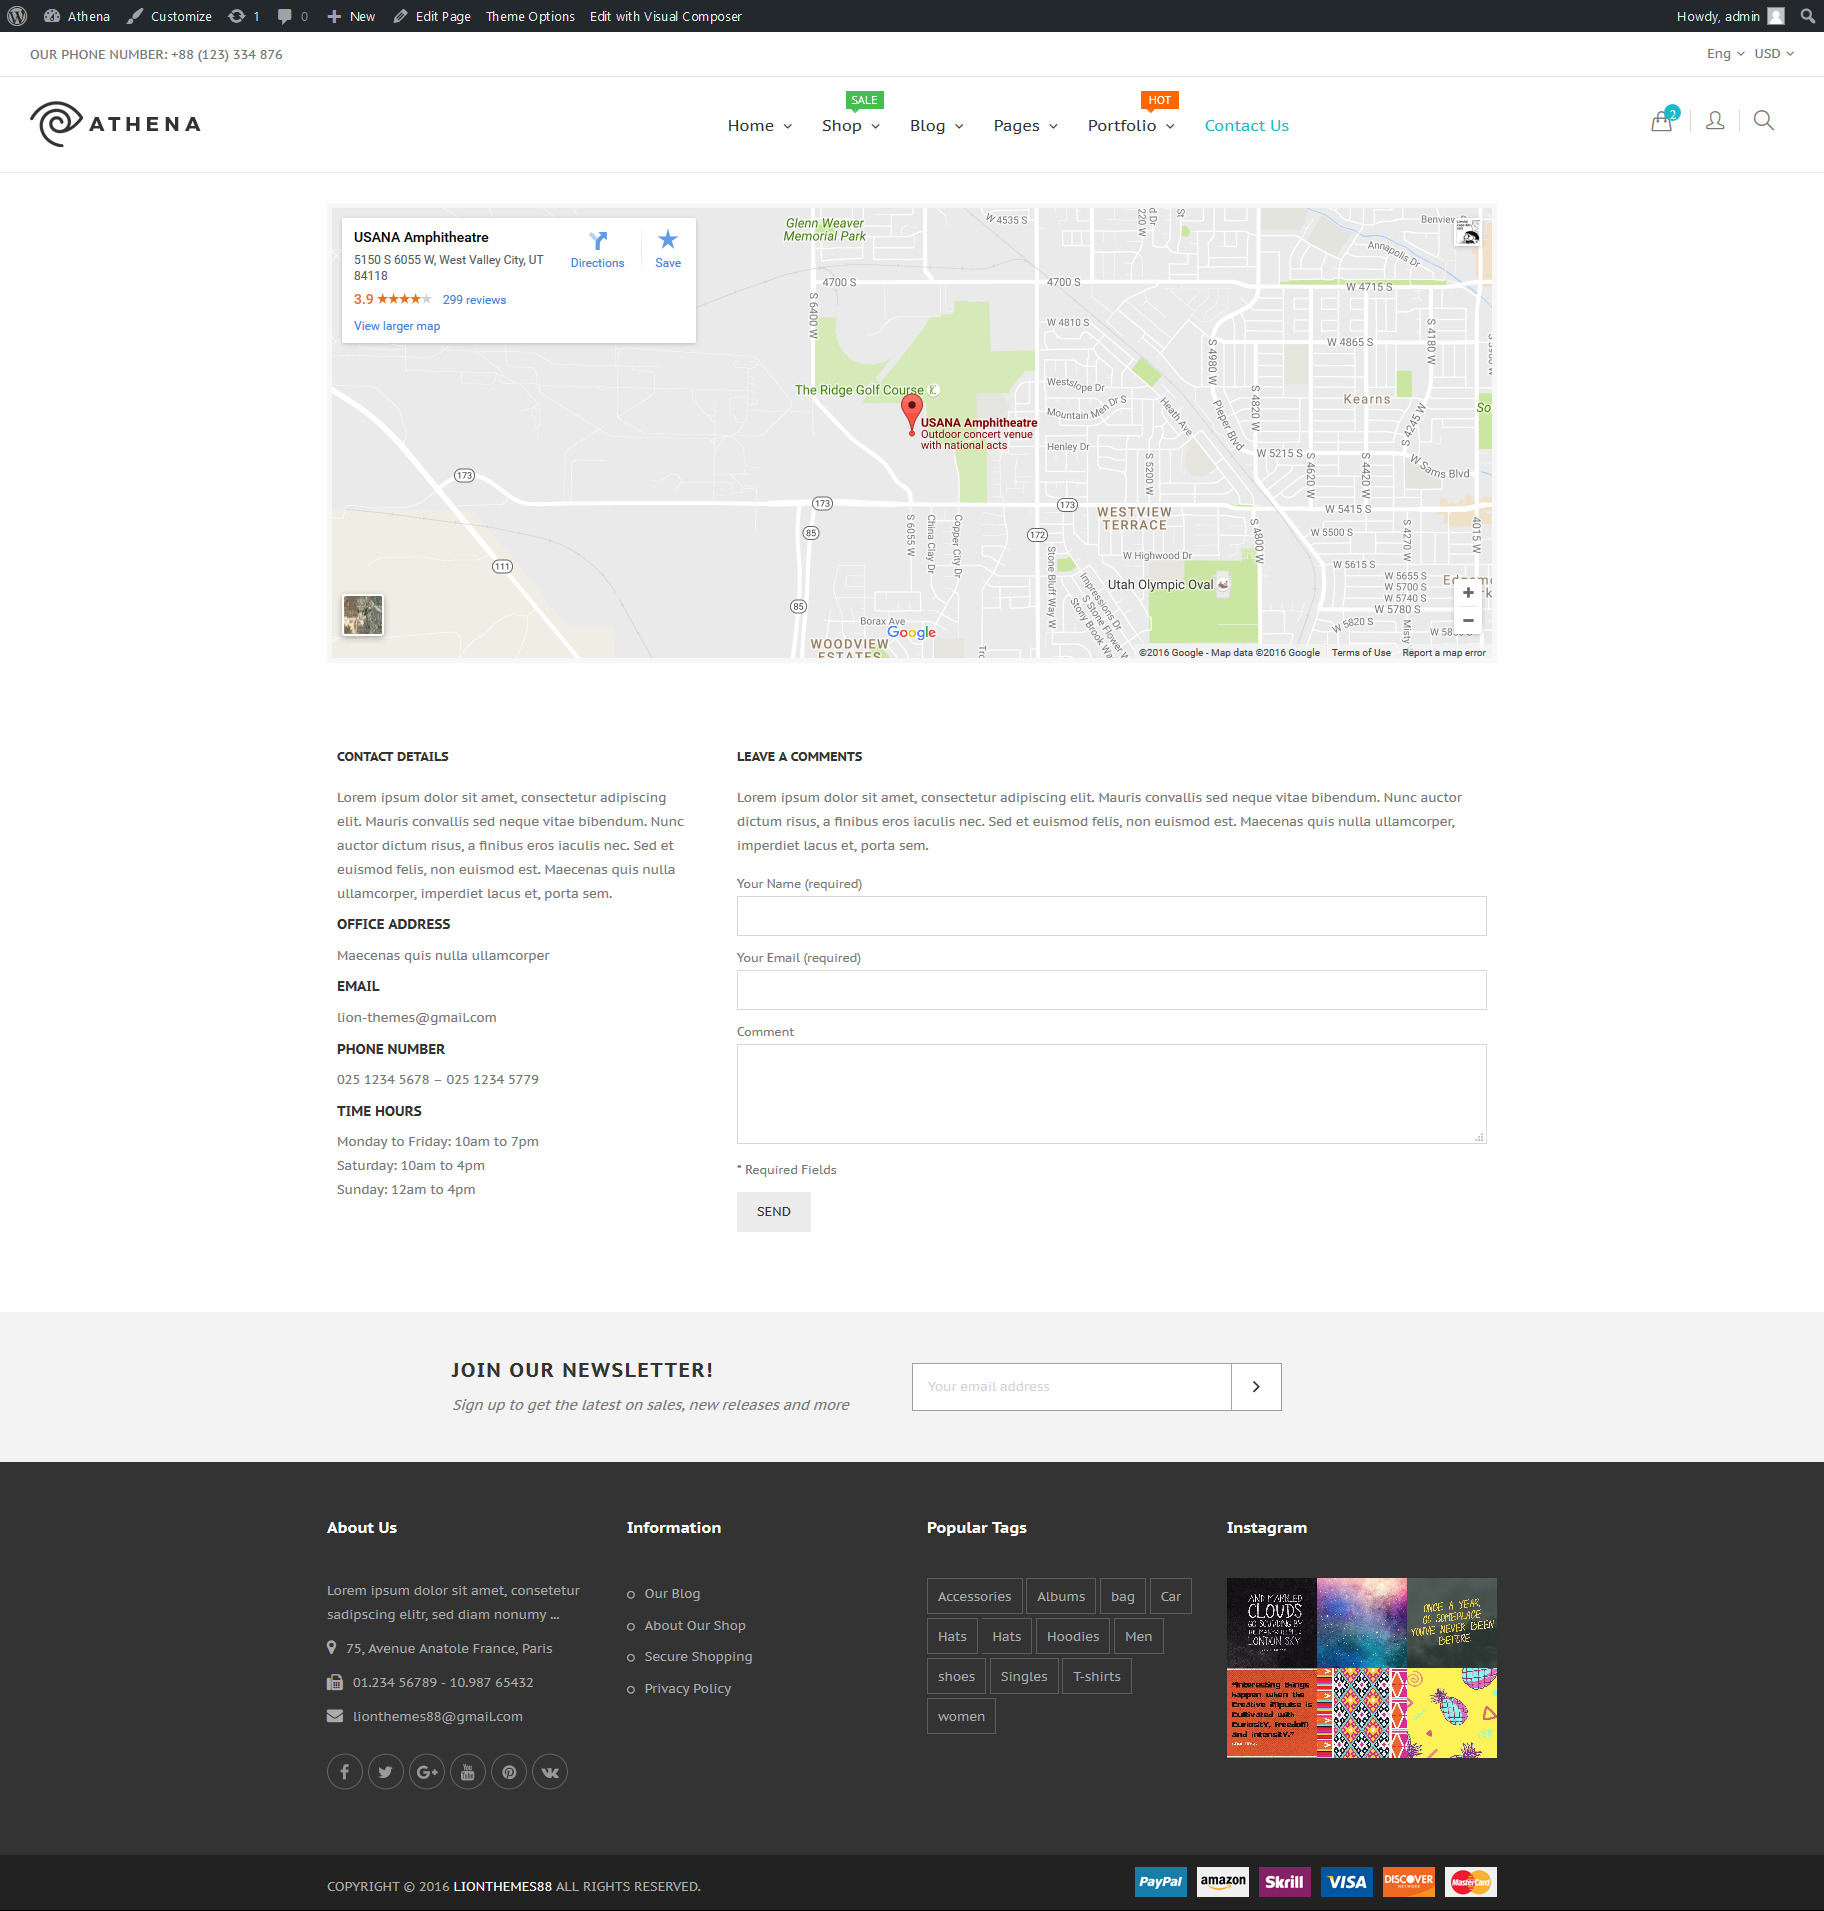
Contact Form
Use this plugin to make the contact form on contact page. Navigate to Contact - Contact Forms, there is a form named Contact form 1, if you want to create a new form, click on Add New button.
Click on the form title to edit form, copy this code and paste into Form box:
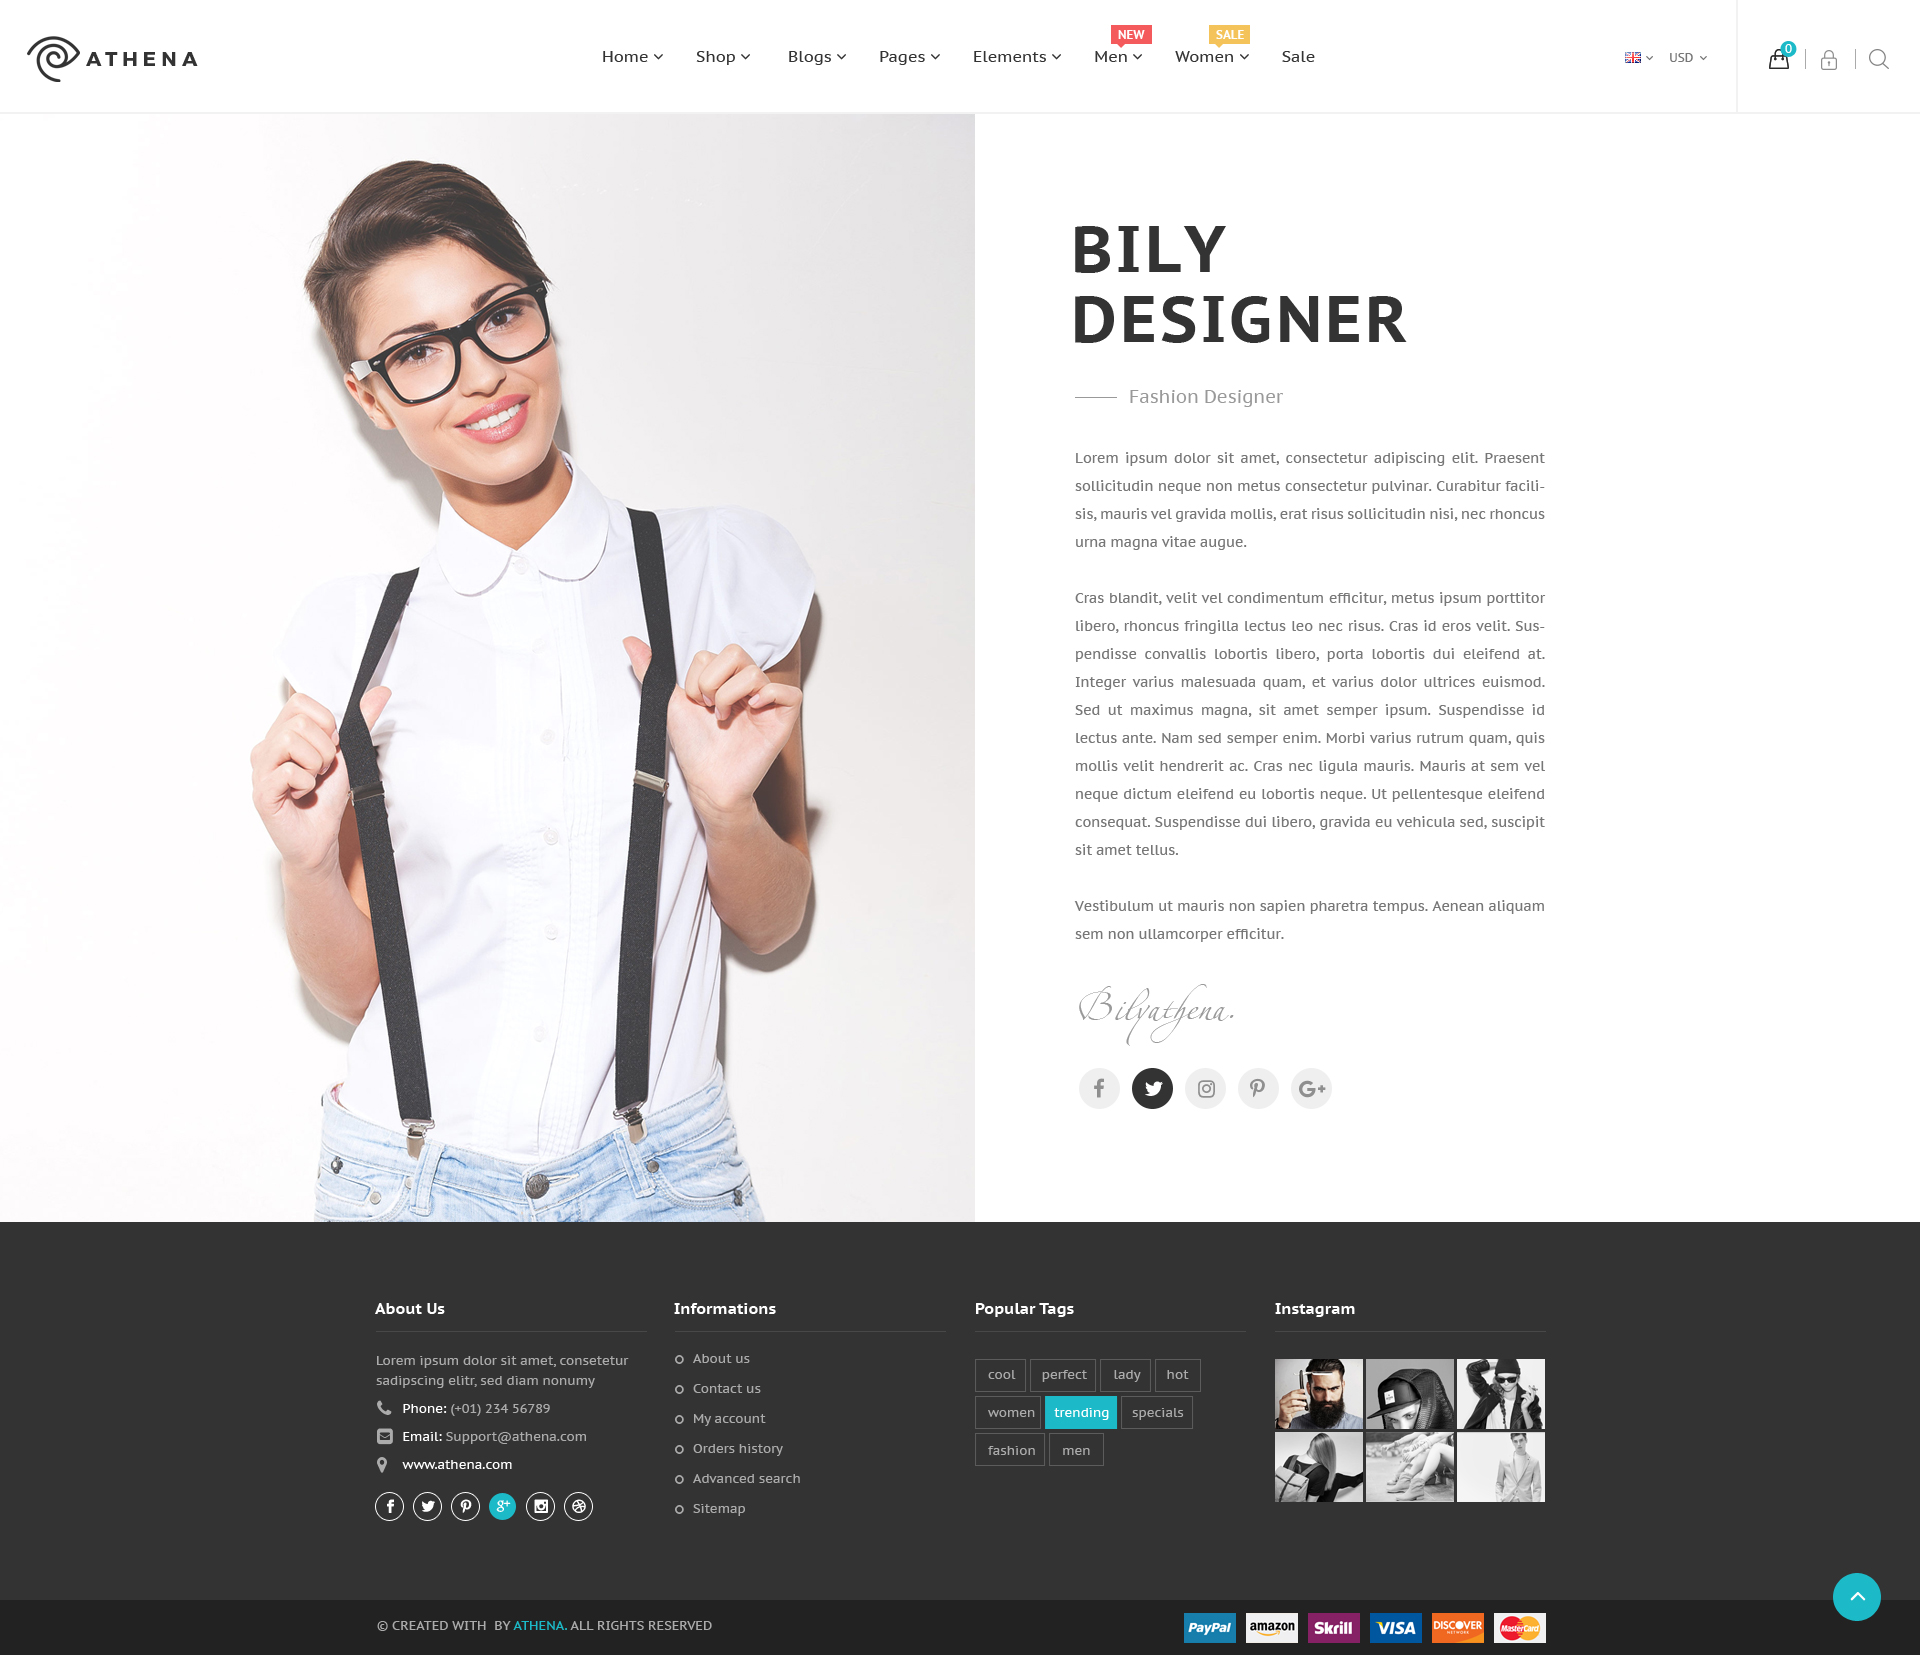
About Us
It is easy to make your About Us look like our demo. Simply copy the code below and paste into the page content (in the Text editor).
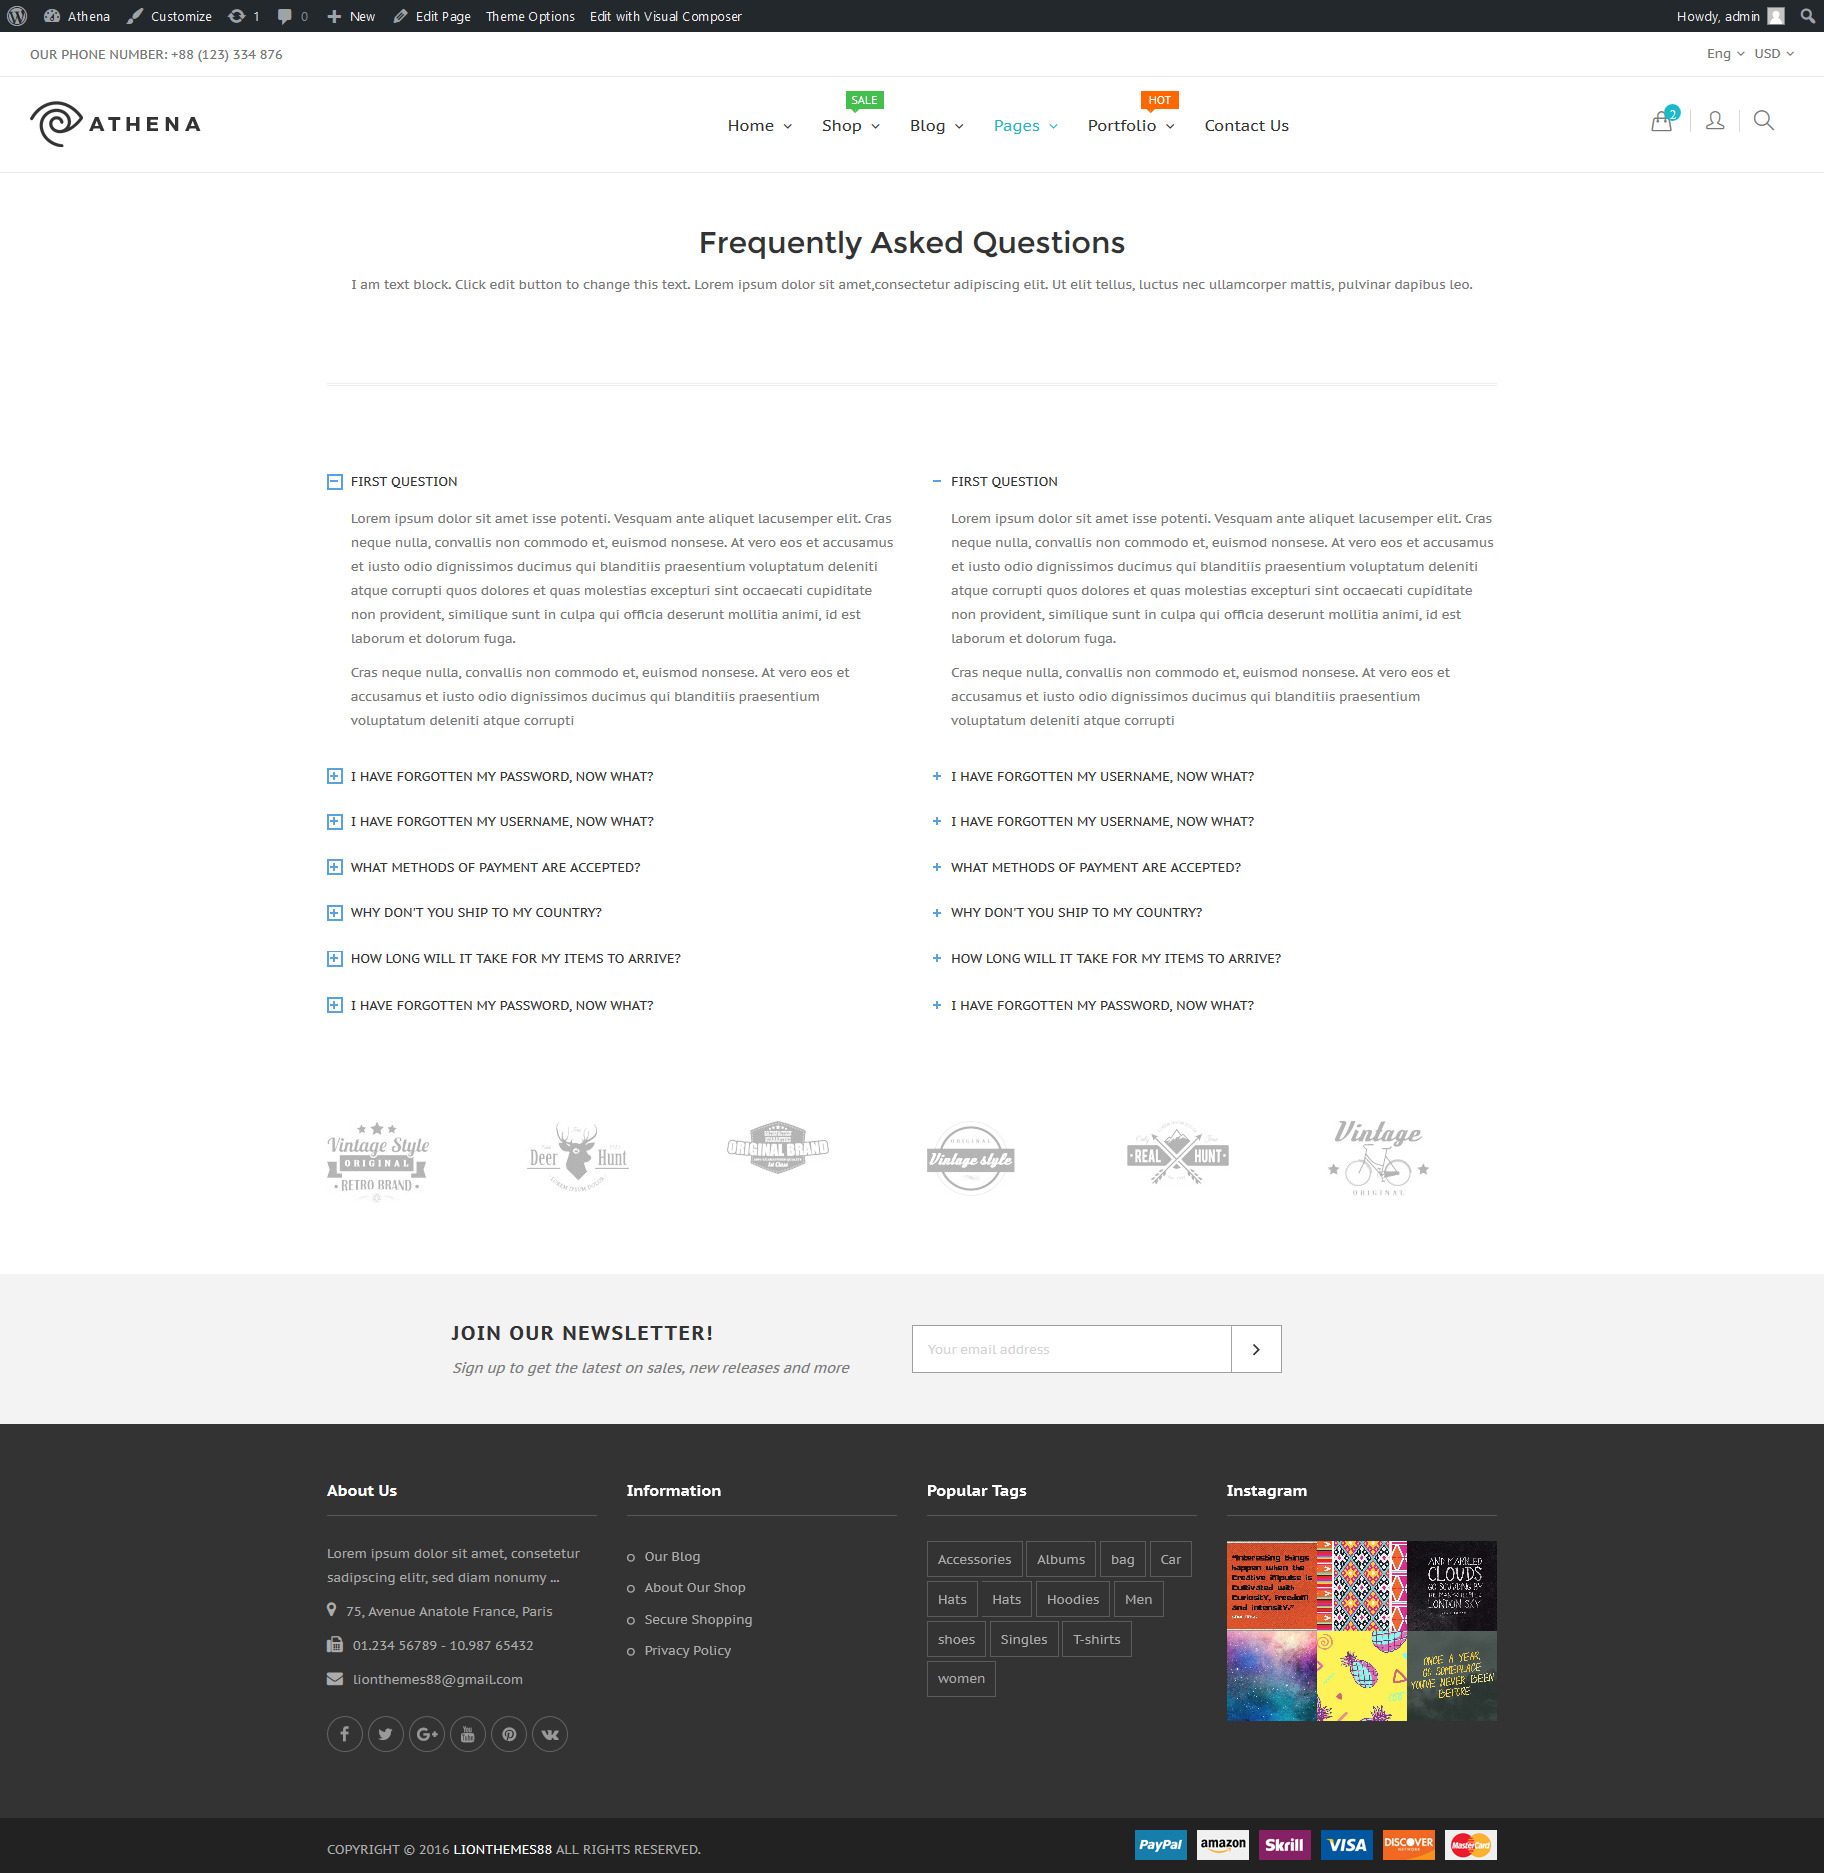
FAQ
It is easy to make your FAQ look like our demo. Simply copy the code below and paste into the page content (in the Text editor).
Configure Plugins
Newsletter MailChimp)
Use this plugin to make the newsletter sign up form on footer. Navigate to MailChimp. Click on Thanks! Now take me to MailPoet. to start using this plugin. Click on Settings link
Step 1: Choose menu follow:
Step 2:
Step 3:
Step 4:
Step 5:
Step 6, the last:
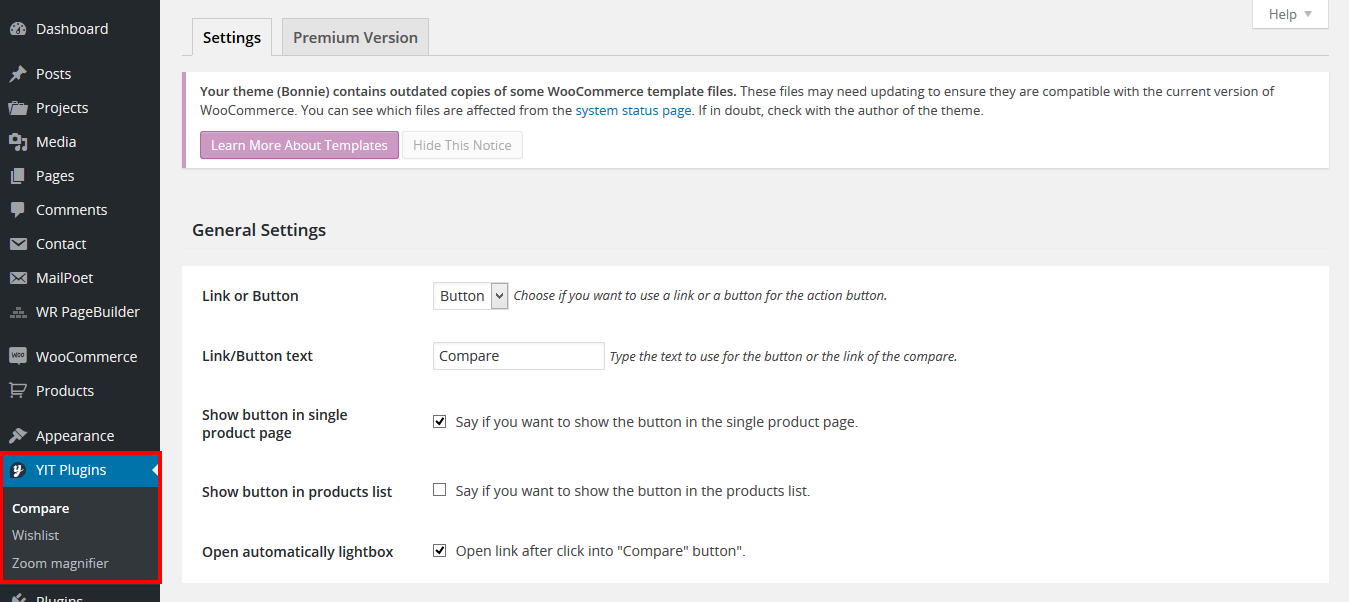
Products Compare
Navigate to YIT Plugins -> Compare.
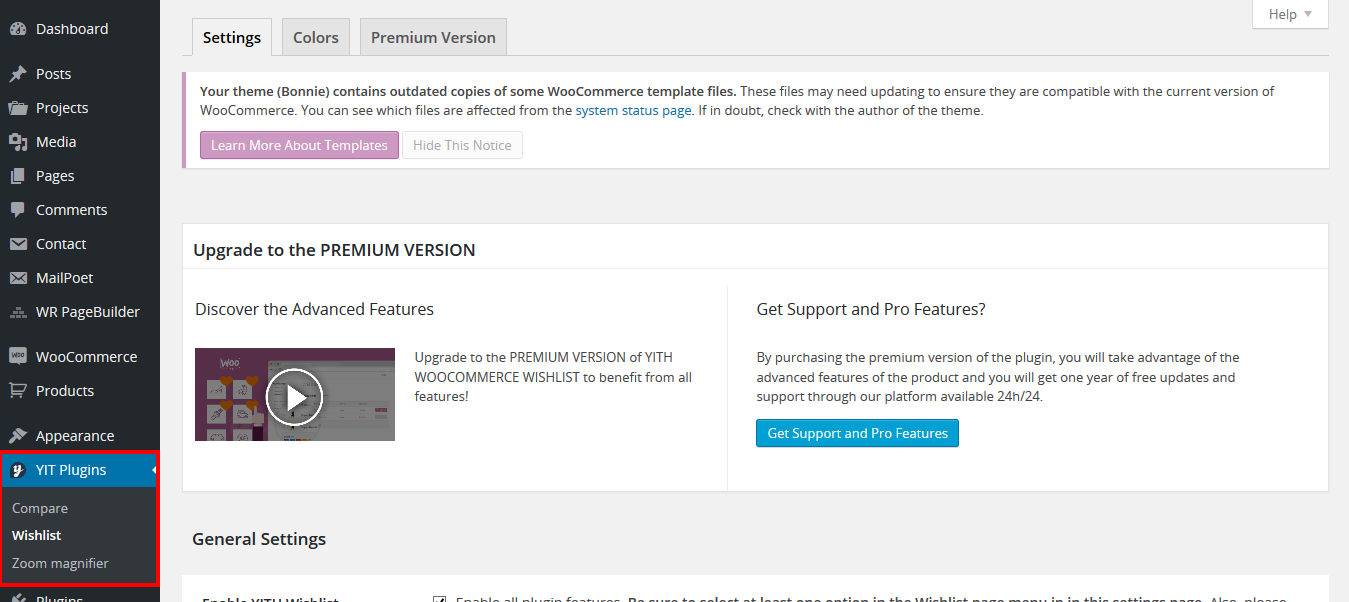
Products Wishlist
Navigate to YIT Plugins -> Wishlist.
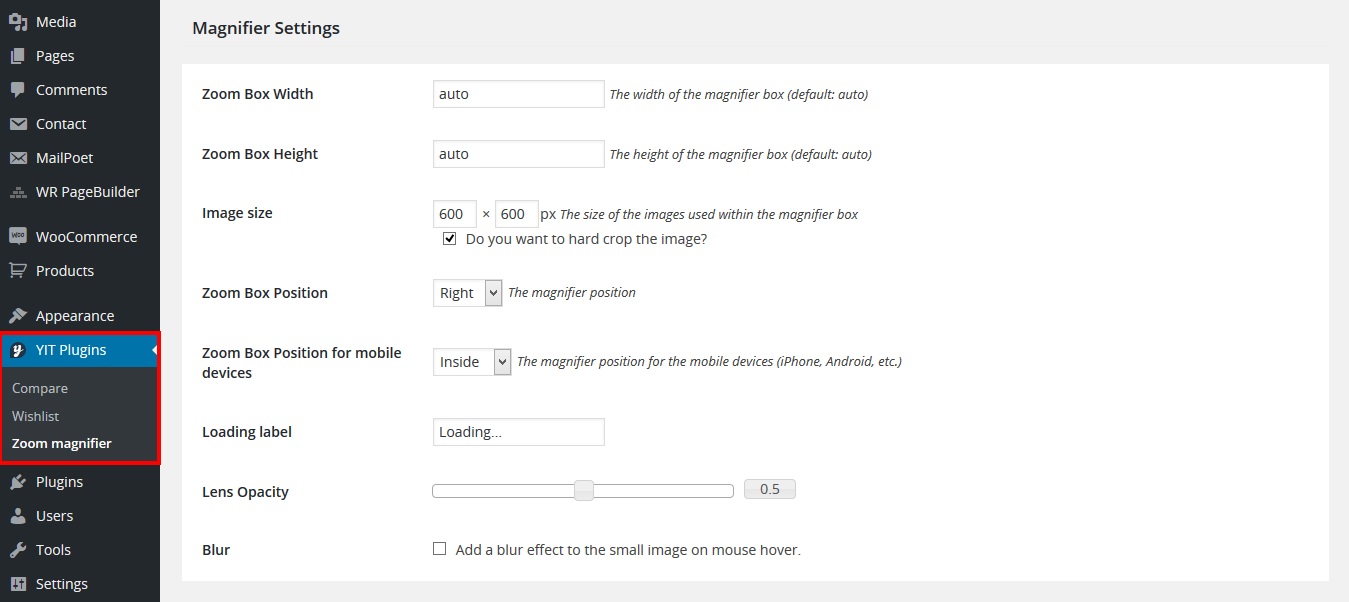
Zoom Magnifier
Navigate to YIT Plugins -> Magnifier.
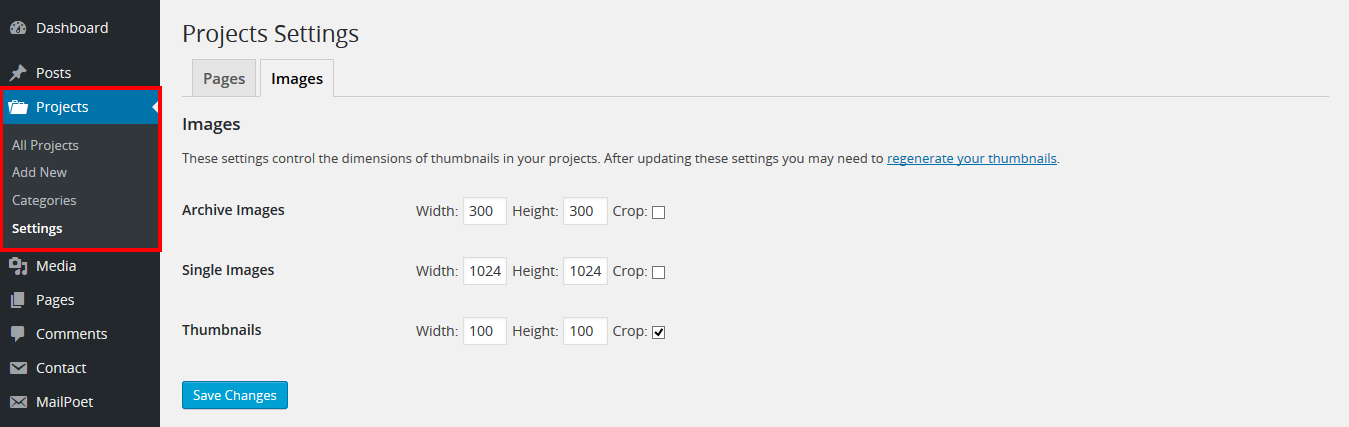
Projects
Go to Projects - Add New to create a new page for portfolio/projects, only enter page title and click "Publish" button.
Go to Projects - Settings, select "Projects Page" in dropdown and click "Save Changes" button. Click on "Images" tab to set image size like this
Visual Composer
Visual Composer will help you manage your content at the WordPress sites and build any layout you can imagine in few minutes without coding. You can read Visual Composer Documentation to get more details.
Please note that you do not purchase directly Visual Composer plugin. So you can not update it by yourself. It is also not recommended. When it has a new version, we will be careful to test and release the new theme's version. If you see the notification below, you can dismiss it.

How to add new element
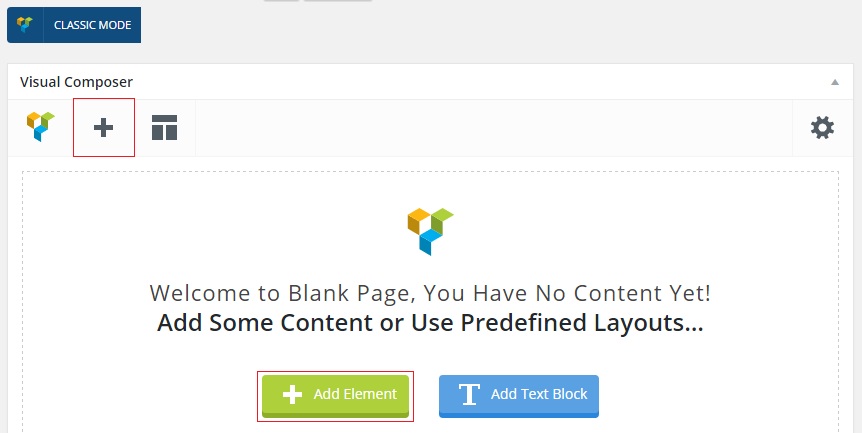
To add new element, you click the BACKEND EDITOR button on the top left of WYSIWYG (text editor)

WYSIWYG editor change to Visual Composer canvas. You can work with it as you do with regular Visual Composer. You can click on the Add element button to add new element
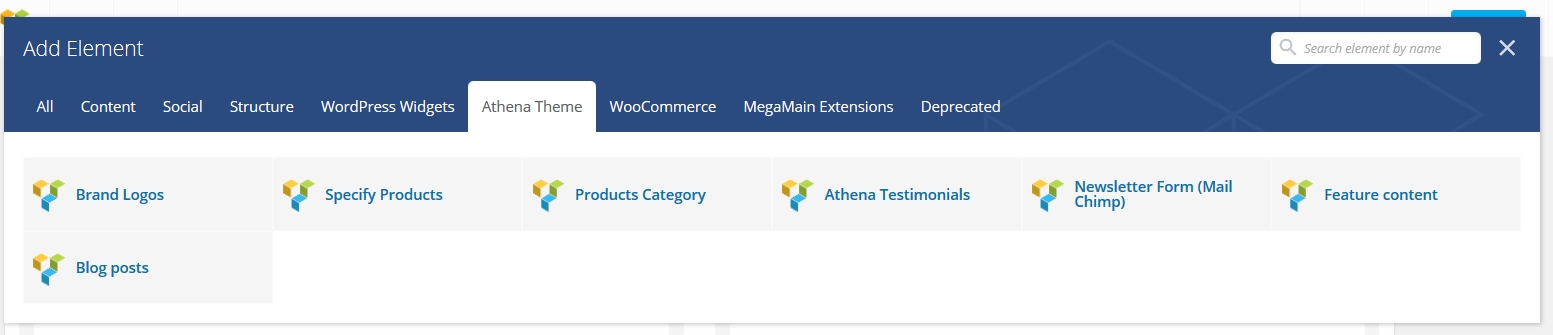
Then, you choose an element from Visual Composer elements list
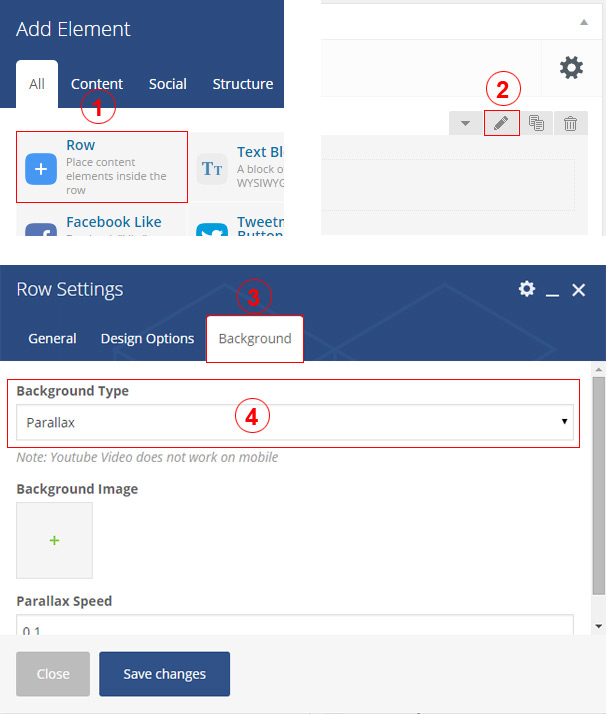
Adding Parallax/Video Background
Follow the steps below to add a parallax/video background
- Add a new Row
- Then, you click to edit that row
- In the Row Settings panel, you select Background tab
- You set Background Type to Parallax, Youtube Video or Hosted Video
- Make some configuration below
Revolution Slider
Athena includes the popular Revolution Slider Created By ThemePunch. This slider is 100% responsive and has many amazing options. In the following sections, you will know how to add a new slider and how to show it in frontend. This is its own documentation. You can read to get more information.
Please note that you do not purchase directly Revolution Slider plugin. So you can not update it by yourself. It is also not recommended. When it has a new version, we will be careful to test and release the new theme's version. If you see the notification below, you can dismiss it.

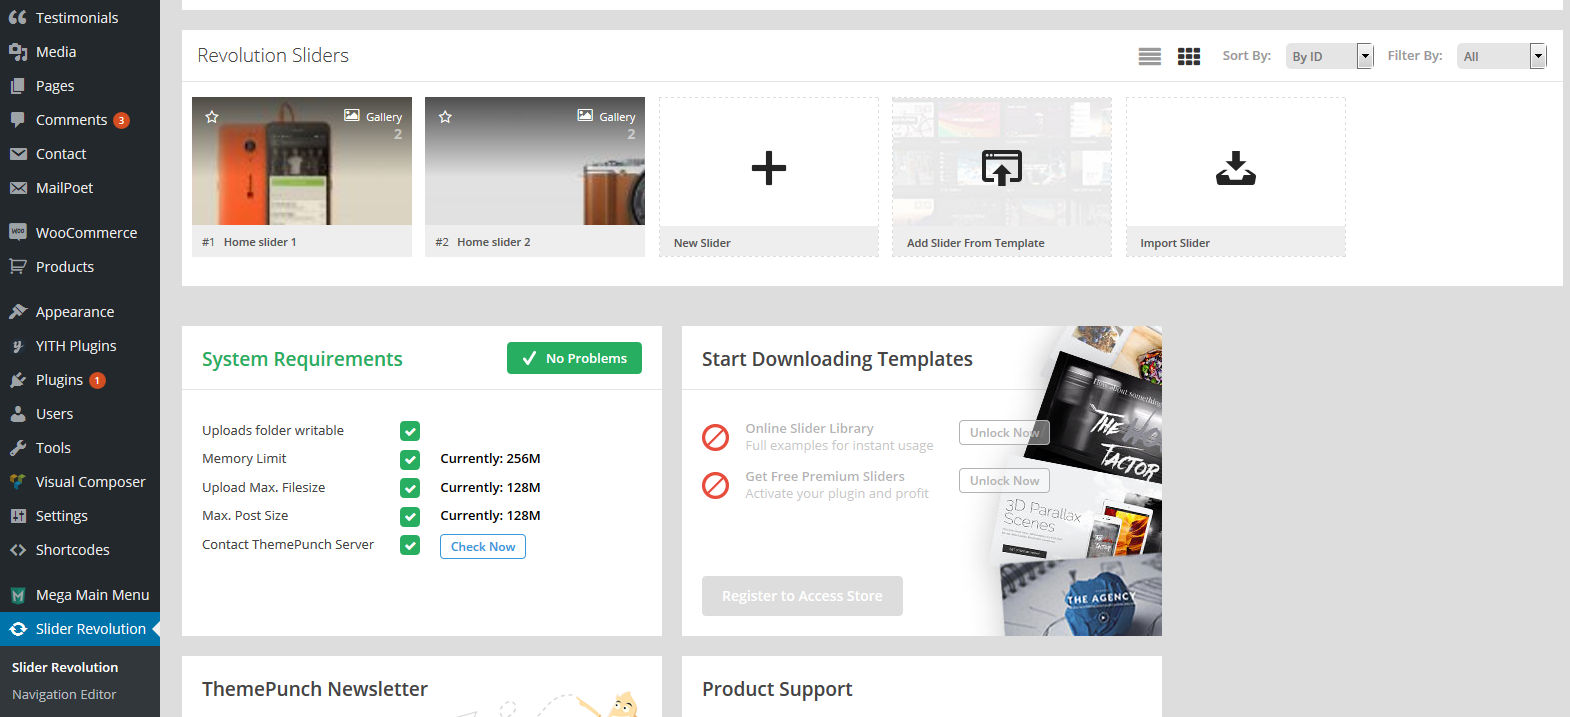
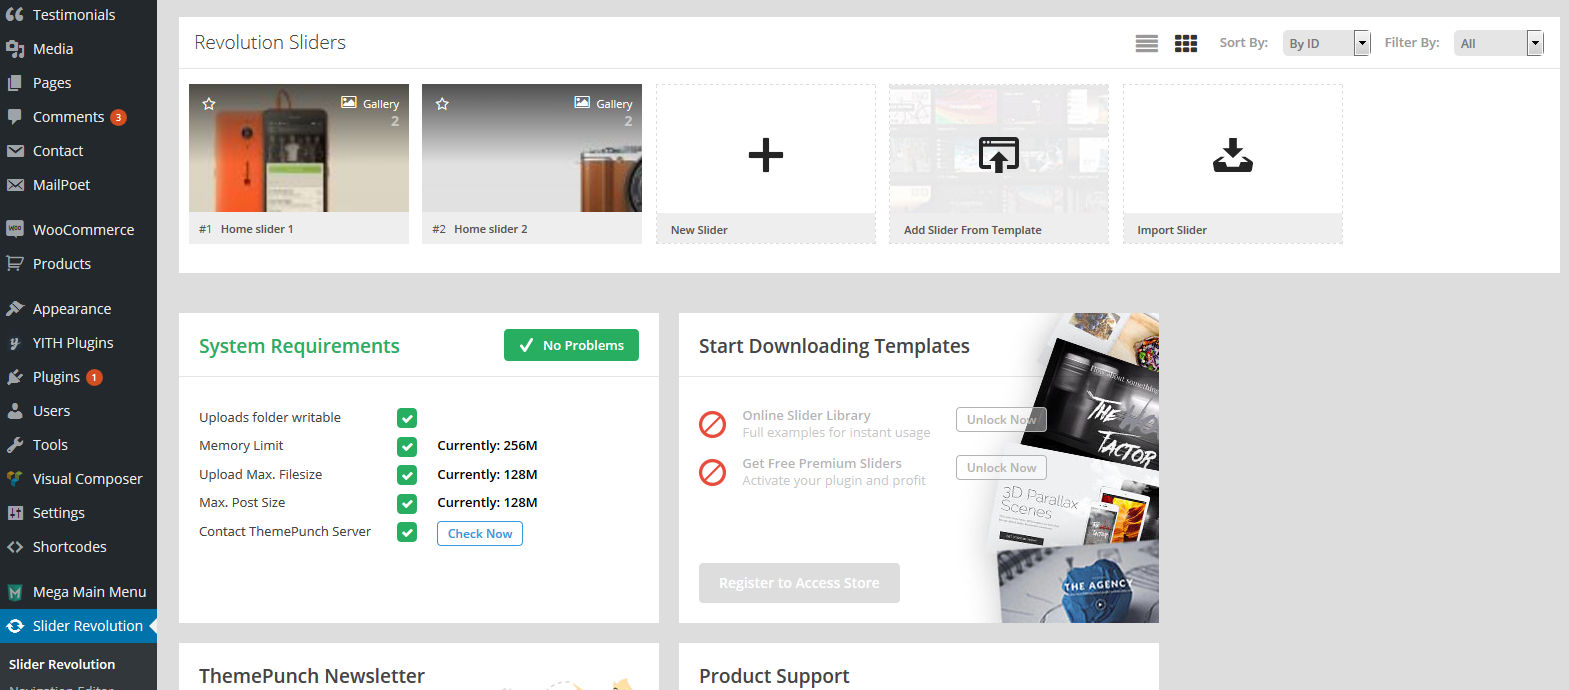
Create A New Revolution Slider
Follow the steps below to create a new Revolution Slider:
- You go to Revolution Slider page
- Click on the New Slider box
- Input the slider title and alias
- Make some configurations
Follow the steps below to add a new slide to your sliders:
- Click on the pen icon to edit your slider as the screenshot
- In Slider Editor, hover your mouse over the Add Slide box and choose one of the options listed below
- Add Blank Slide: create a new slide with default settings
- Add Bulk Slides: create multiple slides at once, based on a selection of media gallery images of your choice
- Add From Template: add the plugin's default templates or your templates
Using Revolution Slider
There are three ways to use Revolution Slider
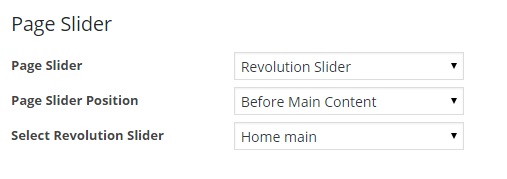
Assign a slider from the Page Options section
- Create or edit a page
- Find the Page Options section below
- Set the Page Slider option to Revolution Slider
- Finally, you choose a slider from the Select Revolution Slider option
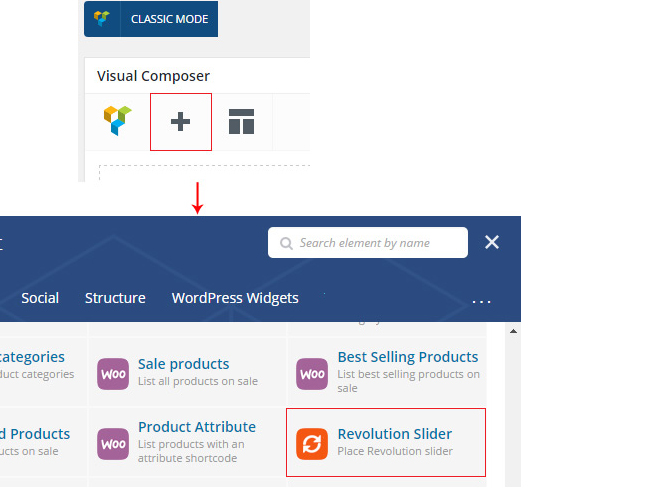
Add slider from Visual Composer content element list
- In the page editor, you click on the Backend Editor button on the top left of WYSIWYG(text editor)
- Then, you click on the Add New Element button
- You find the Revolution Slider element. Choose it
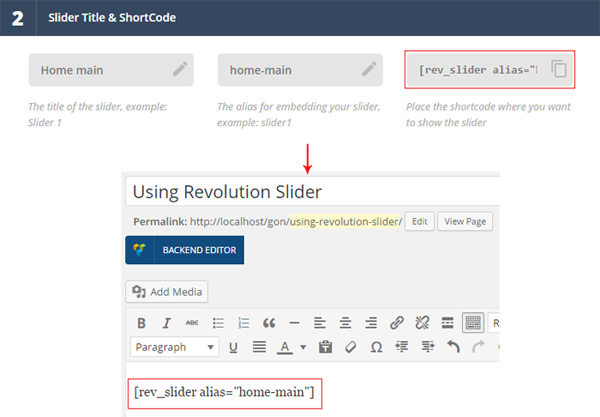
Use the slider shortcode
- You go to the Revolution Slider page
- Click to edit a slider and find the shortcode in the Slider Title & Shortcode box
- Copy the shortcode and paste into your page content
WooCommerce
Athena theme is fully compatible with the latest version of WooCommerce plugin. We customized and added many features, shortcodes and widgets for this plugin. In the following sections, you will know how to install and set up WooCommerce plugin. You can also refer WooCommerce Documentation to get more information.
Install WooCommerce
There are 2 ways to install WooCommerce plugin
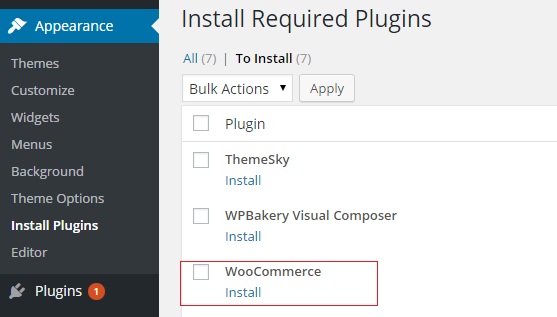
- After activating our theme, you go to Appearance > Install Plugins. You install WooCommerce plugin from the required plugins list.
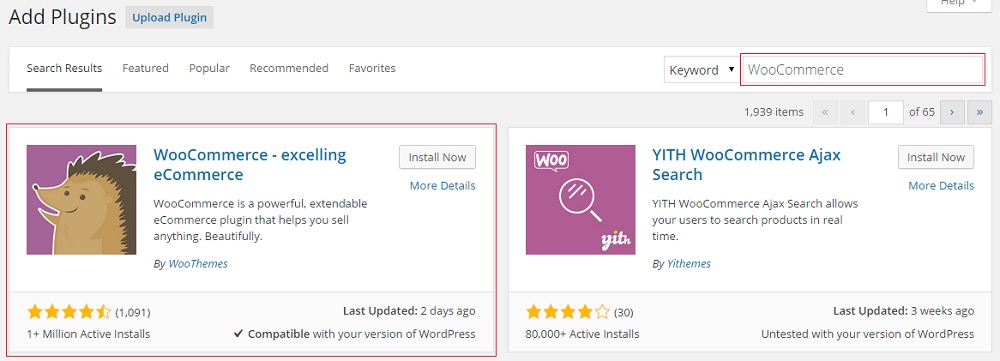
- Install WooCommerce plugin from the Plugins page
Adding WooCommerce Pages
There are 2 ways to add WooCommerce pages
- After activating WooCommerce plugin, you will get a notification as the screenshot below. Simply click the Install WooCommerce Pages button to create all WooCommerce pages
- Use the WooCommerce shortcodes. You can get them here

Setting Up WooCommerce
To set up WooCommerce, you go to WooCommerce > Settings in admin panel.
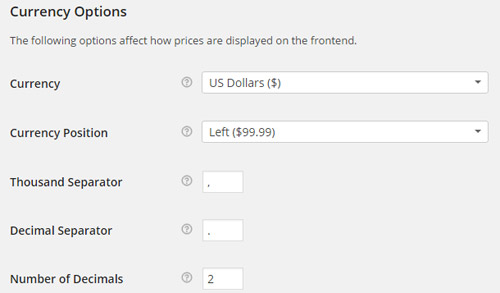
Currency Options
- In WooCommerce Settings page, you select the General tab
- You find Currency Options section and configure your currency
List of currencies that you can choose
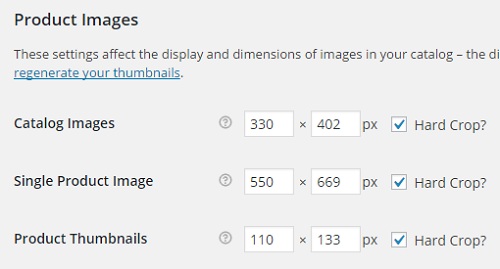
Product Image Sizes
- In WooCommerce Settings page, you select the Products tab. Then you select the Display sub tab
- You find Product Images section and configure your product image size
- Our demo is configured as the screenshot
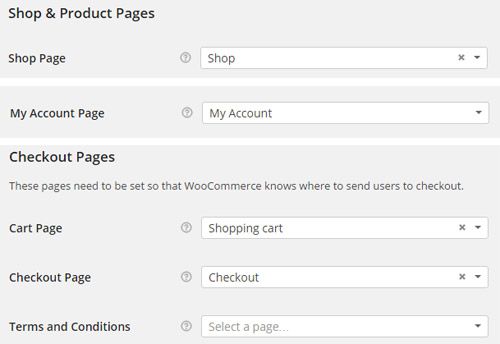
Page Settings
After you create WooCommerce pages. You will go to the Settings page to assign them.
- To assign the Shop page, you select the Products tab and then select the Display sub tab
- To assign the My Account page, you select the Accounts tab
- To assign the Cart and Checkout pages, you select the Checkout tab
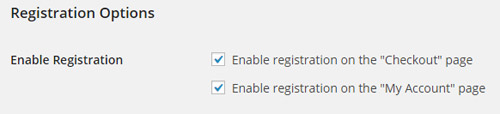
Registration Options
You also make sure that you allow your customers to register on your site. You select the Accounts tab and find the Registration Options section as the screenshot.
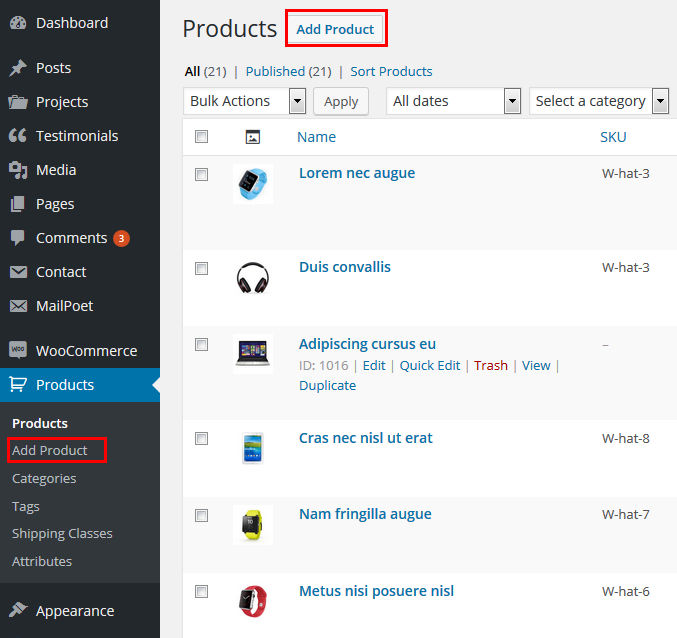
Adding Product
Follow the steps below to add a new product
- In admin panel, you go to Products and click the Add Product button
- Input the product title and product content
- Select Product Category, Product Tag
- Add Featured Image and Product Gallery
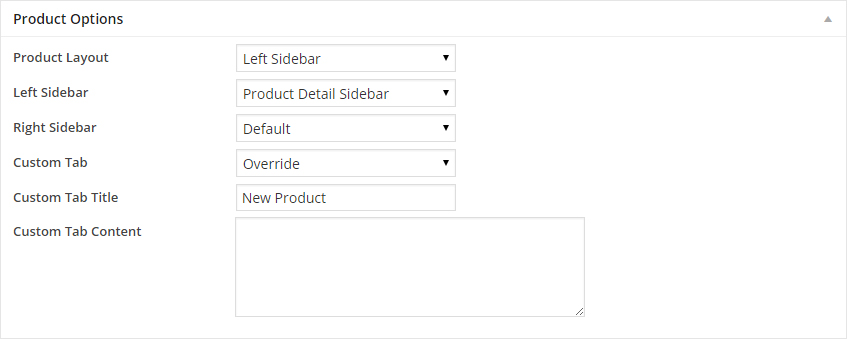
- In the Product Options section, you can override some options in Theme Options
- Next is the Product Data section. This is where the majority of the product data is input
Product Options
This section allows you to override some options in Theme Options. You can set layout for individual products. You can also override custom tab content
Product Data
You should also read WooCommerce Documentation to get more details. We only have some notes that we think you need to know.
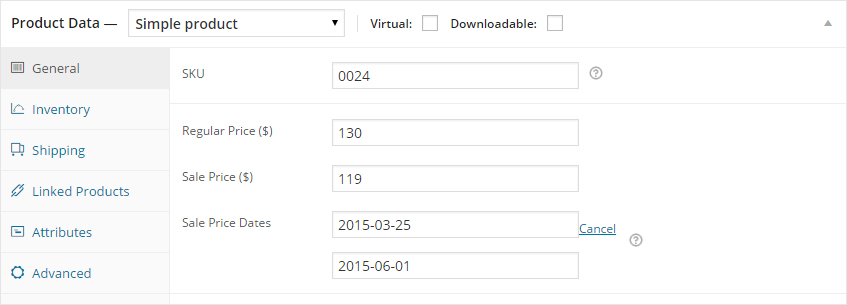
- Adding a product on sale and a deal:
- With the Simple Product, you select General tab. You add a Sale Price and click the Schedule button to set up date.
- With the Variable Product, after setting up Product Attributes in the Attributes tab, you can go to the Variations tab and add New Variation. With each Variation Product, you also click the Schedule button next to the Sale Price field. Please note that product only displays the time of first Variation Product.
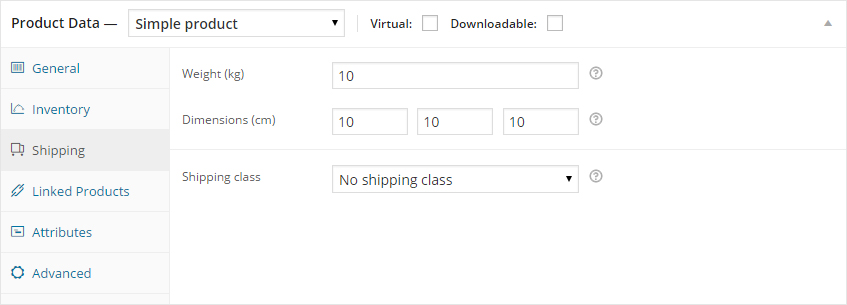
- Adding Additional Information: You go to the Shipping tab. You set value of Weight and Dimensions options. You can change the unit by going to WooCommerce > Settings > Products tab
- Enable/Disable Product Review: You go to the Advanced tab. You will see Enable reviews option. Just check/uncheck it.
Shortcodes
Athena comes with several shortcodes which can be used to display your content. To use our shortcodes, you go to page editor and change to Visual Composer canvas. Click on the Add Element button to open Visual Composer elements list and change to Theme-Sky tab.
- Brand Logos: Setting brand logos.
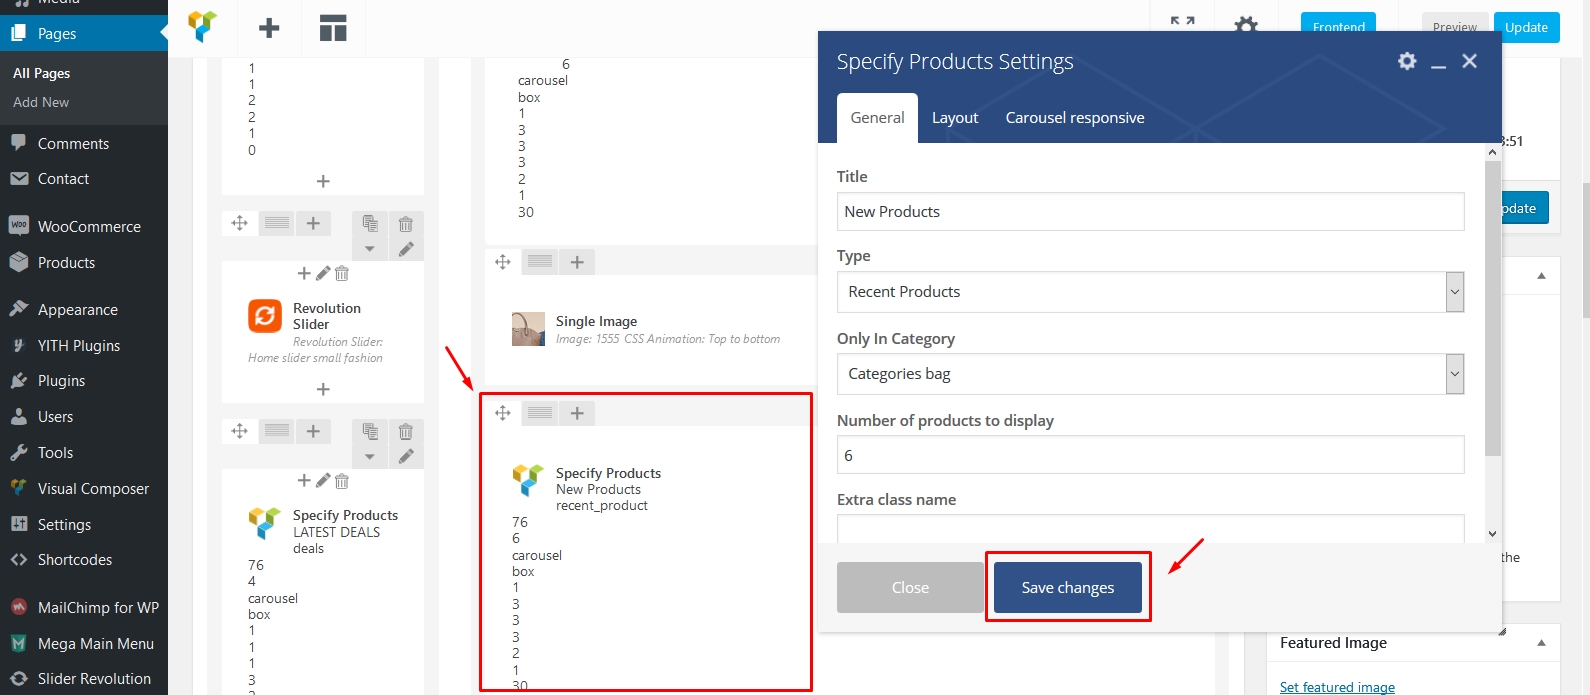
- Specify Product: Create list, grid slider for products.
- Product Category: Create list, grid slider for products tabs.
- Athena Testimonials: Setting testimonial option.
- Blog post: Setting blog post.
In this all field except MailPoet : We can setting title,Number of columns,Number of row, select option show: Grid or Carousel, Add Extra class name, Set Columns count desktop small, set Columns count tablet small , set Columns count mobile, Margin: set spacing between intems.
Child Theme
Use Child Themes to Modify Theme
A child theme is a theme that inherits the functionality and styling of another theme, called the parent theme. Child themes are the recommended way of modifying an existing theme.
Why use a Child Theme?
There are a few reasons why you would want to use a child theme:
- If you modify a theme directly and it is updated, then your modifications may be lost. By using a child theme you will ensure that your modifications are preserved.
- Using a child theme can speed up development time.
- Using a child theme is a great way to learn about WordPress theme development.
How to use a Child Theme?
In this theme, we offer you a sample Child Theme (Athena-child.zip). You install it like normal theme.
Extras
Come together with The WooW, these plugin are recommended to install and active for flexible use.Below are the source for documentation and support of each plugin.
Slider Revolution
The WooW is completely compatible with Slider Revolution. Its intuitive interface with diversified options and effects will be good choice for you slider. If you plan to use Slider Revolution Plugin for you site, check out these source:
Slider Revolution Wordpress Plugin Documentation for user guide to use the plugin.
Slider Revolution Form Support for support upon issues of the plugin.
Slider Revolution FAQs for questions about the plugin.
Woo Commerce
The WooW works compatibly with Woo Commerce, allows you to create your online shop. If you plan to use Woo Commerce Plugin for your site, check out the source:
Woo Commerce Plugin Documentaion for user guide to use the plugin.
Woo Commerce Plugin Community Forum for support upon issues of the plugin.
Woo Commerce Knowleadge Base for question about the plugin
Visual Composer
The WooW works well with Visual Composer, the popular drag and drop page builder plugin with intuitive interface to build your content at ease. If you plan to use Visual Composer Plugin for your site, check out these source.
Visual Composer WordPress Plugin Documentation for user guide to use the plugin
Visual Composer WordPress Plugin Support System for support upon issues of the plugin
Contac Form 7
The WooW is fully compatible with Contact Form 7, the free form plugin recommeneded to create a nice form for your site. If you plan to use Contact Form Plugin for your site, check out these source.
Contact Form 7 Plugin Page for basic information about the plugin.
Contact Form 7 Plugin Documentation for user guide to use the plugin.
Contact Form 7 Plugin Support Forum for support upon issues of the plugin.
MailChimp for WordPress
MailChimp for WordPress Plugin Support for support upon issues of the plugin.